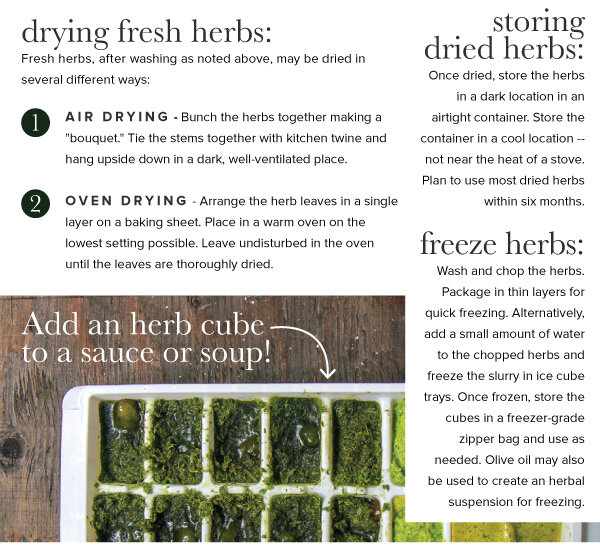
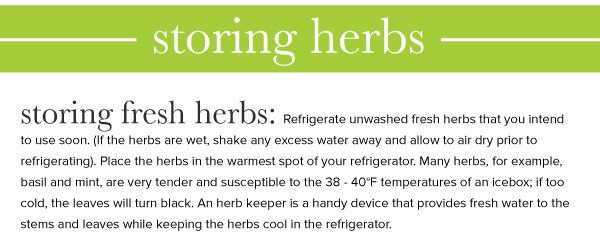
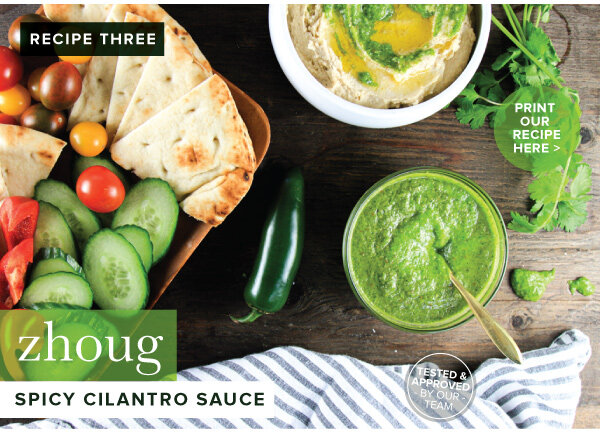
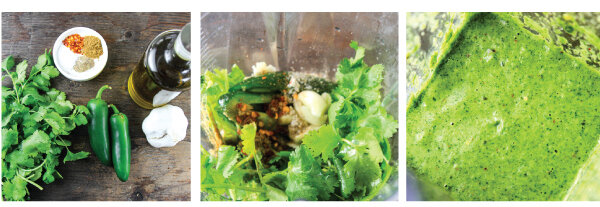
cilantro

Marinated Flank Steak

Steak_v2_01.jpg

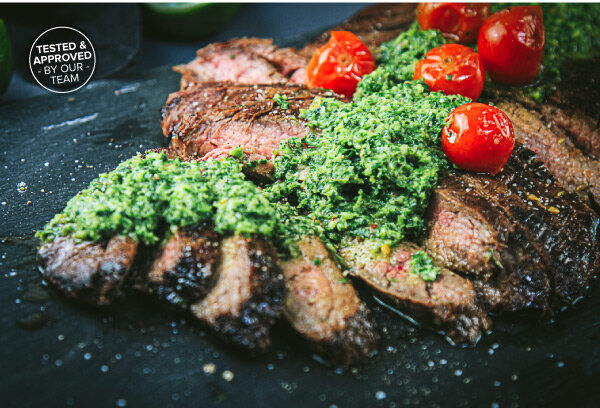
Treat Dad to delicious steak from the grill! Perfectly grilled meat is a great way to anchor a celebration meal! Our version of tender flank steak is filled with savory flavors from the marinade and grilling process itself. The steak is further enhanced with the fresh herbal flavors of a tantalizing chimichurri sauce, and the bursting freshness of blistered cherry tomatoes.

Marinated Flank Steak With Chimichurri & Blistered Cherry Tomatoes
Serves 4

Ingredients:
1 (2 lb) flank steak
8 oz cherry tomatoes

For the Marinade:
2 tablespoons olive oil
2 teaspoons Worcestershire sauce
1/4 cup soy sauce
1 small lime, juiced (about 1/8 cup)
1 tablespoon honey
1 teaspoon Kosher salt
1/2 teaspoon freshly ground pepper
1 teaspoon chili powder
1/2 teaspoon garlic powder

For the Chimichurri:
1 cup fresh flat-leaf parsley (stems are ok)
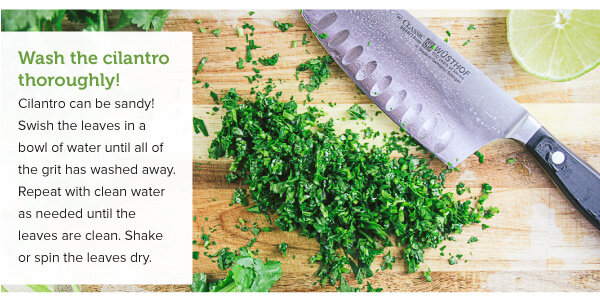
1 cup fresh cilantro (stems are ok)
2 garlic cloves, peeled
1 small shallot, halved (about 2 tablespoons)
1 small jalapeño pepper, quartered, seeds removed
1/2 cup olive oil
1/4 cup red wine vinegar
3 tablespoons fresh lime juice
3/4 teaspoon dried crushed red pepper
1/2 teaspoon Kosher salt
1/2 teaspoon black pepper

Directions:
1. WHISK THE MARINADE ingredients together until combined, and then pour over the flank steak. Chill and marinate in a sealed container or bag for 1 hour, or up to overnight. Allow the steak to come to room temperature for about 20 minutes prior to grilling.

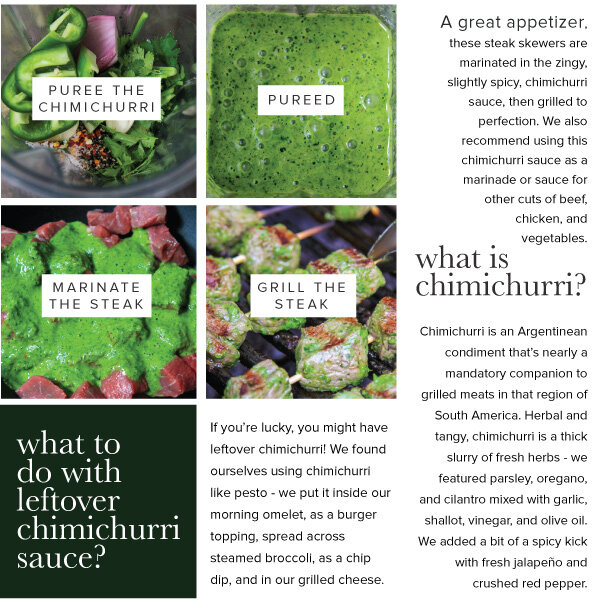
2. PREPARE THE CHIMICHURRI SAUCE. In a powerful blender or food processor, combine all of the chimichurri ingredients and pulse until well combined but still with some texture to the sauce. Set aside until ready to serve with the cooked steak.

3. GRILL THE STEAK! Fire up the grill, preheat the grill to high. Place the steak on the grill, and cook for 3-4 minutes, flip once, and cook for another 3-4 minutes. Continue grilling and flipping until the internal temperature reaches 135°F for medium-rare.

4. REMOVE THE STEAK FROM THE GRILL, and let it rest for 10 minutes to let the juices set and reabsorb.

5. WHILE THE STEAK RESTS, PREPARE THE BLISTERED CHERRY TOMATOES. Toss the tomatoes in 1 tablespoon of olive oil. In a cast iron skillet on the stovetop or in a grill basket on the grill, cook the cherry tomatoes. Sear and toss until the tomatoes begin to blister, and just begin to crack open. Remove from the heat.

6. When ready to serve, cut the steak into thin strips slicing against the grain.

7. Serve with a generous spoonful of chimichurri sauce and several blistered cherry tomatoes.

Fiesta Chop Salad

FiestaChop2021_v3_01.jpg

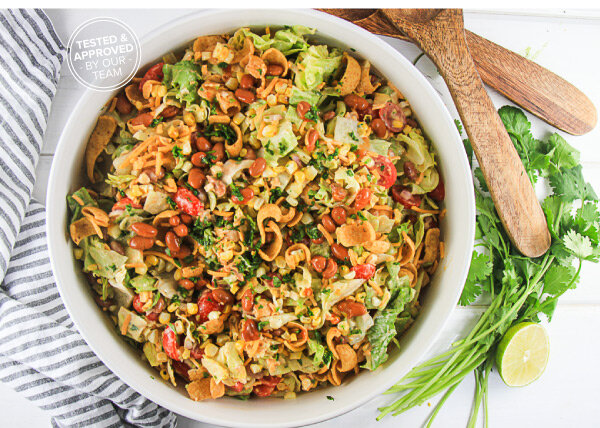
This Fiesta Chop Salad is packed with goodies! Start with the fresh crunch of chilly iceberg lettuce, then add cheese, chili beans, red onions, tomatoes, grilled corn, AND corn chips! The creamy, tangy cilantro dressing ties it all together. Enjoy all the fresh, delicious flavors – your taste buds will be doing a happy dance!

Fiesta Chop Salad
Serves 6 - 8

Creamy Cilantro Dressing:
(makes about 1 cup of dressing)
1/4 cup white wine vinegar
1 tablespoon fresh lime juice
1/4 cup olive oil
1/2 cup plain Greek yogurt
2 teaspoons sugar
1/2 teaspoon dried cumin
1/2 teaspoon garlic powder
1/2 teaspoon dried oregano
1/4 teaspoon paprika
1/4 teaspoon Kosher salt
1/4 teaspoon black pepper
2 tablespoons fresh cilantro, minced

Salad Ingredients:
1 head chopped iceberg lettuce
10 oz grape tomatoes, halved
1 can (14 oz) chili beans, slightly drained
4 ears corn, grilled and kernels cut off the cob
Olive oil for brushing corn cobs
1/4 red onion, finely diced
3 cups grated sharp cheddar cheese
2 cups corn chips (like Fritos)

Directions:
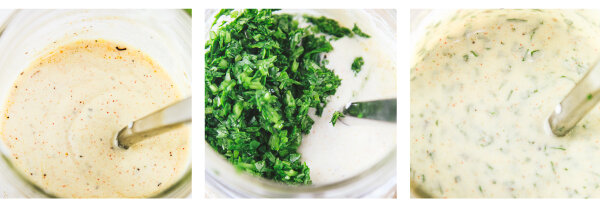
1. Make the dressing. Prepare the cilantro by finely mincing for the dressing. Whisk together the vinegar, lime juice, olive oil, Greek yogurt and sugar together in a small jar until well combined. Add the spices and cilantro, and whisk or shake until emulsified.

2. Prep the veggies. Over direct heat, grill the corn (turning as needed) until char marks appear. About 15-20 minutes. Once the grilled corn has cooled slightly, carefully cut the kernels off from the cob with a sharp knife, or a corn stripping tool.

3. Meanwhile, wash and chop the lettuce. Finely dice the red onion and halve the grape tomatoes.

4. Assemble the salad. Toss all of the salad ingredients together with the dressing and then top the salad with the corn chips. Toss once more to incorporate the chips. Serve immediately!

Cranberry Salsa Crostini

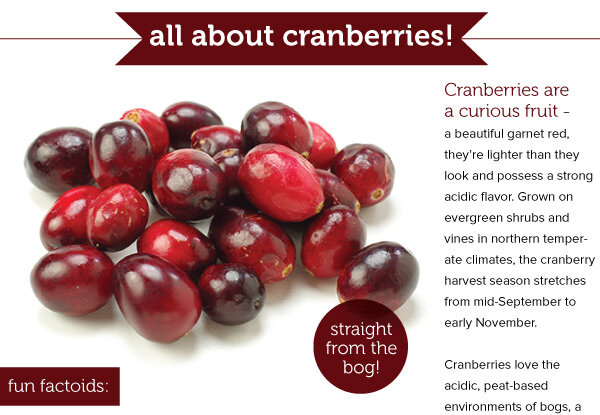
Looking for a fast and festive appetizer? This Cranberry Salsa Crostini is just the answer! It's delicious and a cinch to assemble. It takes advantage of an often stereotyped, seasonal fruit and presents it in a new way. Try this during Thanksgiving week, and maybe a few more times throughout the upcoming holiday season.

Cranberry Salsa Crostini
Makes 2.5 cups of salsa

Salsa Ingredients:
1 bag (12oz) fresh cranberries
2 jalapeños, seeded and coarsely sliced
4-6 scallions, green and white parts, sliced (about 1/2 cup)
1/4 cup cilantro, roughly chopped, packed
1 tablespoon lime juice, freshly squeezed
1/4 teaspoon Kosher salt
3/4 cup sugar, more to taste, as desired
1/4 teaspoon cumin

Homemade Crostini:
Slice a baguette into 1/4” slices, brush each slice with olive oil on both sides and bake (turning once) at 375°F until golden brown - about 5-7 minutes per side.

To Serve:
16 oz. cream cheese (two pkgs.)

Salsa Directions:
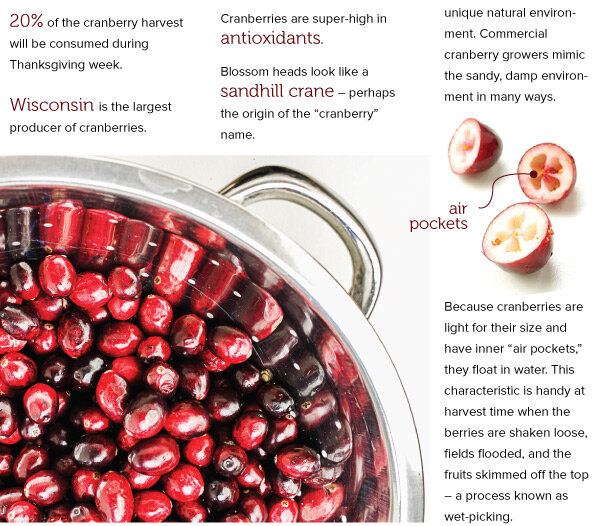
1. Rinse the fresh cranberries in a colander. Pick out any bruised or withered berries. Towel dry the cranberries and place into the work bowl of a food processor.

2. Cut off the stem end of the jalapeño peppers, halve, remove the seeds, and any rib membranes. Coarsely chop the peppers and add to the cranberries. Prep the scallions by washing and trimming away the root end. Roughly slice the scallions including about 6 inches of the onion’s green portion. Add the scallions to the food processor.

3. Rinse the cilantro well and pat dry. Remove any coarse stems of the cilantro, but it’s perfectly fine to include the tender portion of the stems in this salsa. (Not having to stem the cilantro will save a lot of time!) Add the cilantro to the food processor.

4. Add the remaining ingredients: lime juice, salt, sugar, and cumin.

5. Pulse the mixture in the food processor stopping occasionally to scrape down the sides. Chop until all of the ingredients are finely chopped, but not pureed.

6. Transfer the mixture to a bowl for refrigerator storage. Chill for at least one hour. As the salsa chills, the sugar will promote the release of the cranberries’ juices. It will turn a lovely deep red – a dazzling color for any holiday table all season long. Stays fresh for up to 3 days -- a great do-ahead dish!

Easy Tikka Masala & Basmati Rice

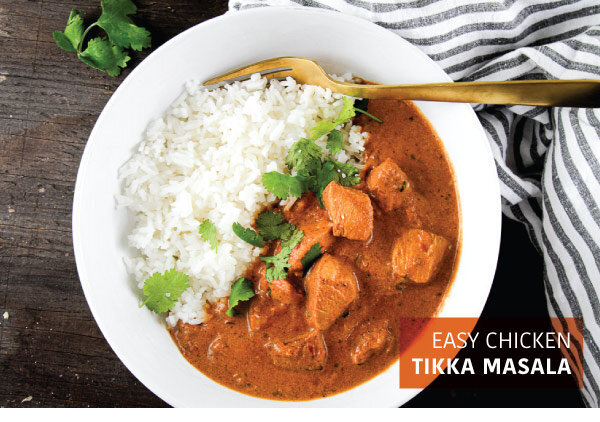
In this recipe, we bring the wonderful flavors of chicken tikka masala to the table on any day of the week, thanks to the amazingly fast electric pressure cooker! Serve with fragrant basmati rice and generous sprinkles of chopped cilantro. YUM!

Easy_Tikka_v3_12.jpg

Easy Chicken Tikka Masala
Serves 4 - 6

Bring the wonderful flavors of this delicious dish home any day of the week thanks to the amazingly fast electric pressure cooker! This recipe calls for a lighter approach using slightly less butter than other recipes. A combination of Greek yogurt and coconut milk (instead of heavy whipping cream) adds a bit of extra tanginess to the global flavors. Savory spices mingle with fresh garlic, ginger, and tomatoes. The coconut milk creates a dreamy, silky sauce. Serve with fragrant basmati rice and generous sprinkles of chopped cilantro.

Ingredients:
4 large boneless chicken breasts, cut into 1” chunks
5 cloves garlic, finely minced
1-1/2 tablespoons fresh ginger, finely grated
3 tablespoons tomato paste
1 (28 oz.) can crushed tomatoes
2-1/2 teaspoons Garam Masala, divided
1 tablespoon ground cumin
1 tablespoon paprika
1/2 teaspoon cayenne pepper
1 teaspoon ground coriander
2 teaspoons Kosher salt
1/2 teaspoon ground black pepper
1 cup coconut milk
1 cup plain Greek yogurt
4 tablespoons butter, sliced into tablespoons
1 tablespoon cilantro, minced, plus additional for garnish

Electric Pressure Cooker Directions:
1. Prepare the garlic and ginger. Mince the garlic finely and grate the ginger into a fine paste.

2. Place the cut chicken in the bottom of an electric pressure cooker and then toss with the garlic and ginger.

3. In a large bowl, whisk together the tomato paste and crushed tomatoes until well combined.

4. Add the spices to the tomato mixture: 2 teaspoons Garam Masala, cumin, paprika, cayenne, coriander, Kosher salt, and black pepper. Stir until well combined.

5. Pour the spiced tomato mixture over the chicken. Toss until coated.

6. Cover, and cook on high pressure for 10 minutes.

7. Carefully release the pressure according to your appliance’s instructions. Check that the chicken is fully cooked and is at 165 degrees F. If the chicken needs more time, continue to cook on the simmer function until the chicken reaches 165 degrees in the center.

8. Once the chicken is fully cooked, add the coconut milk, yogurt, butter, 1/2 teaspoon Garam Masala and minced cilantro. Stir until combined and a sauce begins to form. If the sauce needs additional time to thicken, switch to the simmer function, and stir and simmer until the sauce thickens to your desired consistency.

9. Serve warm over basmati rice. Garnish with additional minced cilantro.

Basmati Rice:
1 tablespoon butter
2 tablespoons shallot, minced
2 cups basmati rice, rinsed
1/2 teaspoon Kosher salt
3-1/2 cups water

Rice Directions:
1. Rinse rice with cold water until the water runs clear.

2. Using a heavy-bottomed pot with a lid, sauté the shallot in the butter until the the shallot becomes translucent. Add the rice, and stir it until coated and every grain has a sheen.

3. Add the water and salt, and bring to a boil. Stir occasionally to make sure that the rice doesn't stick to the bottom. Once boiling, turn the heat to low and cover with a tight-fitting lid. Simmer the rice on low for 18-20 minutes or until the rice becomes tender.

4. Remove from heat, and let set for 10 minutes with the lid still on. Fluff with a fork before serving.

Grilled Chicken 3 Ways

Chicken_3ways_v2_01.jpg

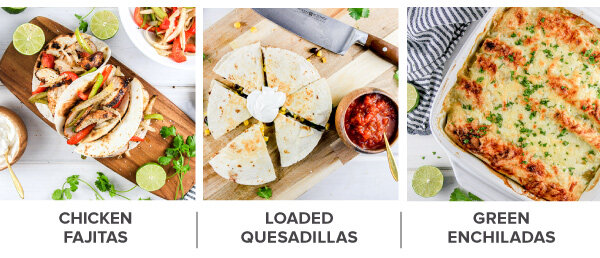
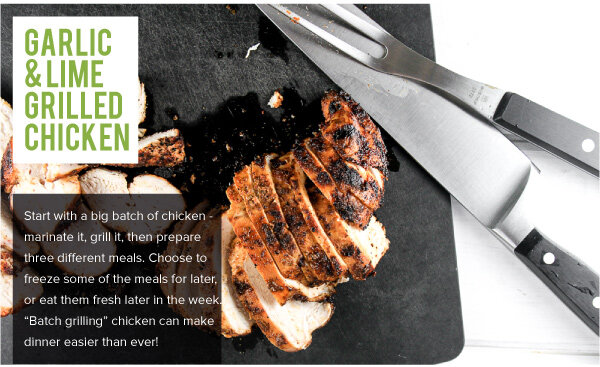
Let's make dinnertime easier! Prepare a big batch of marinated and grilled chicken breasts and then transform that chicken into three delicious meals. IN THIS ISSUE, we feature three easy recipes using grilled chicken - fajitas, quesadillas, and green enchiladas.

Garlic & Lime Grilled Chicken

Garlic & Lime Grilled Chicken:
6 chicken breasts - some now, some later 

Marinade:
1 tablespoon lime zest (about two small limes)
2 tablespoons chili powder
2 tablespoons garlic powder
1 tablespoon paprika
1 tablespoon cumin
1 tablespoon sugar
1 teaspoon pepper
1 teaspoon Kosher salt
1/2 cup vegetable oil
2 tablespoons fresh lime juice

Garlic & Lime Grilled Chicken Directions:
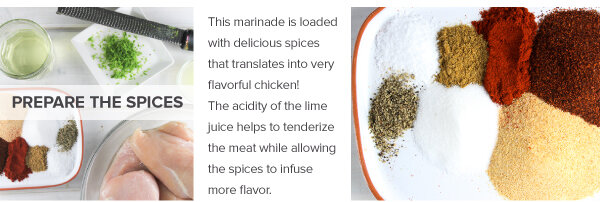
1. In a small bowl, combine the lime zest and the marinade spices: chili powder, garlic powder, paprika, cumin, sugar, pepper, and salt. Stir together until evenly mixed. 

2. Place the chicken breasts in a large bowl or in a sealable bag inside of a large bowl. 

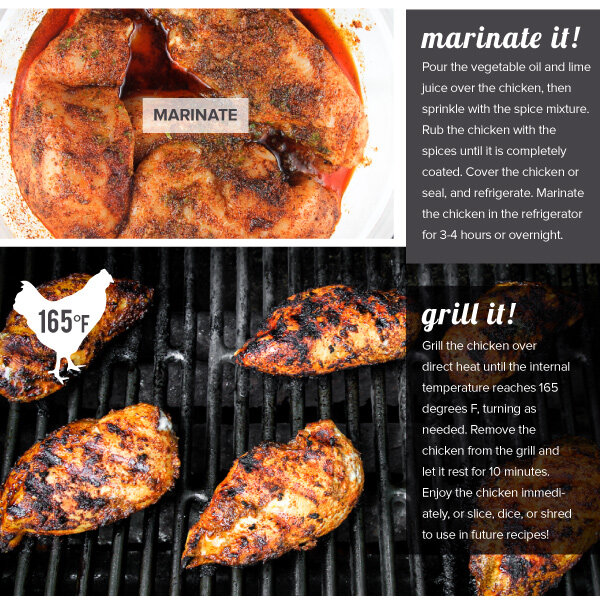
3. Pour the vegetable oil and lime juice over the chicken, then sprinkle with the spice mixture. 

4. Rub the chicken with the spices until it is completely coated. 

5. Cover the chicken and refrigerate. Marinate the chicken in the refrigerator for 3-4 hours or overnight. 

6. Fire up the grill! Heat the grill; ensure your grill grates are clean and well-oiled. 

7. Grill the chicken over direct heat until the internal temperature reaches 165 degrees F, turning as needed. 

8. Remove the chicken from the grill and let it rest for 10 minutes. 

9. Enjoy the chicken immediately or slice, dice, or shred to use in future recipes.


Chicken Fajitas
Serves 4 

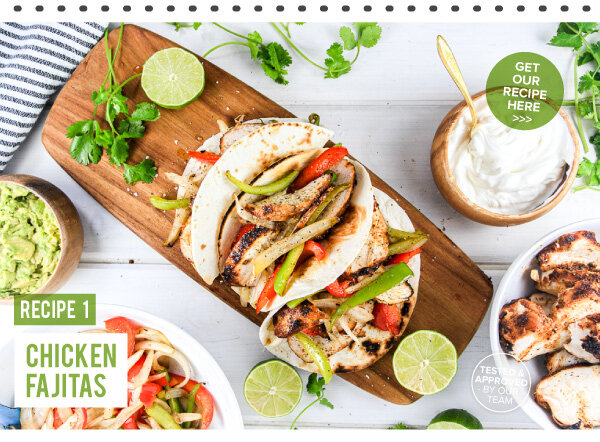
Fajitas are a colorful, delicious, and healthy option for getting dinner on the table quickly! With the chicken already marinated and grilled, simply grill onions and peppers to add to the chicken. Complete the tasty fajitas with an array of toppings! Some of our favorite fajita toppings include sour cream, cilantro, salsa, hot sauce, a squeeze of lime, salsa, and a little guacamole! 

Fajitas:
2 chicken breasts (marinated, grilled, and diced)
4 flour tortillas, warmed
1 red pepper, sliced into strips
1 green pepper, sliced into strips
1 sweet onion, sliced pole to pole
2 tablespoons olive oil
1/2 teaspoon Kosher salt
1/2 teaspoon pepper 

Toppings:
Sour cream
Avocado
Lime wedges
Fresh cilantro leaves
Salsa, and/or hot sauce 

Directions:
1. Prepare the chicken breasts according to the Garlic & Lime Chicken directions above. 

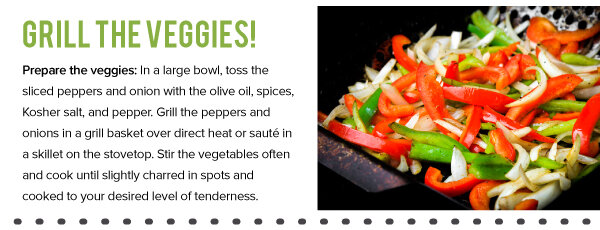
2. Prepare the veggies. In a large bowl, toss the sliced peppers and onion with the olive oil, Kosher salt, and pepper. Grill the peppers and onion in a grill basket over direct heat or sauté in a skillet on the stovetop. Stir the vegetables often and cook until slightly charred in spots and cooked to your desired tenderness. 

3. Toss the cooked vegetables with the grilled chicken slices. 4. Serve with warmed tortillas and a variety of your favorite toppings.


Loaded Chicken Quesadillas
Serves 4 

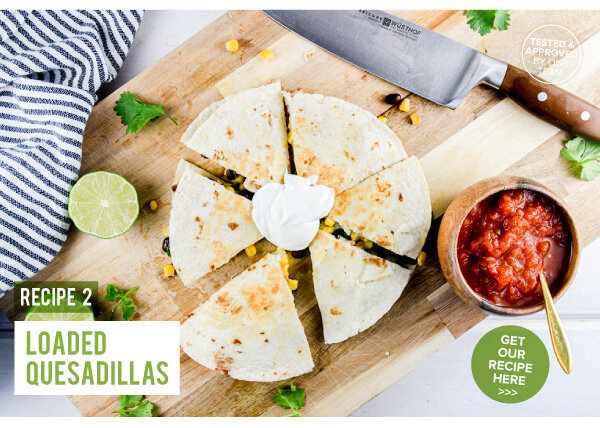
These quesadillas are loaded with grilled and diced chicken, black beans, spinach, corn, and plenty of cheese. We love quesadillas for lunch or dinner. Everyone can customize their order to their own preference. Add additional flavor with a variety of toppings! 

Quesadillas:
2 chicken breasts (marinated, grilled, and diced)
8 tortillas
8 oz pepper jack cheese, grated
1 can (15 oz) black beans, rinsed and drained
8 oz frozen corn, thawed
4 oz spinach leaves 

Toppings:
Sour cream
Avocado
Lime wedges
Fresh cilantro leaves
Salsa
Pickled jalapeños
Hot sauce 

Directions:
1. Prepare the chicken breasts according to the Garlic & Lime Chicken directions above. 

2. Use a panini press or a skillet on the stovetop to cook the quesadillas. 

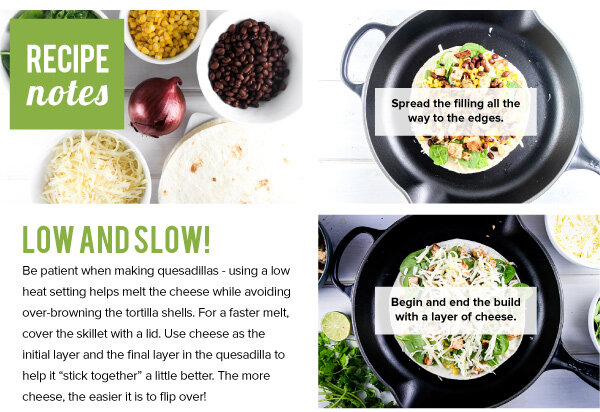
3. Load a tortilla with a layer of pepper jack cheese, then add all of the quesadilla ingredients: diced chicken, black beans, corn, and spinach leaves. Finish with another layer of cheese, then top with another tortilla. 

4. If cooking on the stovetop use low heat and practice patience while the cheese melts! Using a large spatula, flip the quesadilla after the cheese has melted enough to hold it together. 

5. Cut the quesadilla into wedges and enjoy warm with an array of toppings.


Chicken Green Enchiladas
Makes 8 enchiladas 

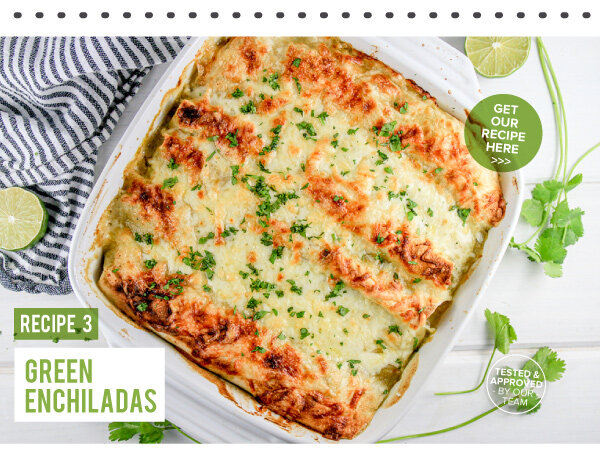
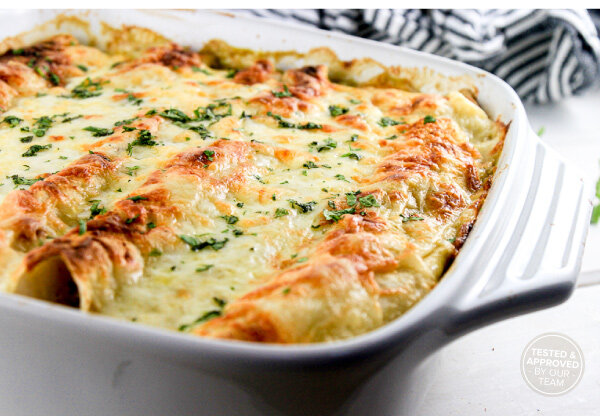
Cheesy and creamy, these green enchiladas are one great definition of comfort food! The green enchilada sauce is enhanced with a filling of grilled and diced chicken, white beans, green chilies, cheese, onion, garlic, herbs, and a little sour cream. After stuffing and rolling the enchiladas, add another layer of sauce on top. Don’t forget to finish with a hearty layer of cheese. After baking, garnish with fresh cilantro. So tasty! 

Enchiladas:
2 garlic & lime chicken breasts (marinated, grilled, and sliced)
2 tablespoons olive oil
1 onion, diced
2 cloves garlic, minced
1 teaspoon dried oregano
1 teaspoon dried cumin
1/2 teaspoon Kosher salt
1/2 teaspoon freshly ground pepper
1 can (4 oz) diced green chilies
1 can white beans, rinsed and drained
2 cups Monterey Jack cheese, shredded
1 can (28 oz) green enchilada sauce
1 cup sour cream 

Garnishes:
Lime wedges, Fresh cilantro leaves, Pickled jalapeños, Hot sauce 

Directions:
1. Preheat the oven to 400 degrees F. 

2. Sauté the onion and garlic in a large skillet until the onion is translucent. Season the onions with oregano, cumin, salt, and pepper. 

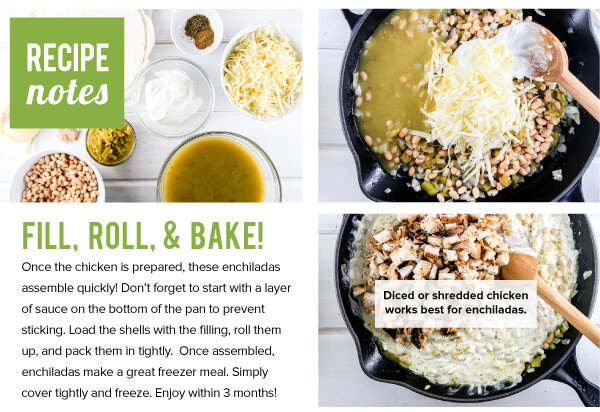
3. Add the green chilies, white beans, 1 cup of grated cheese, 1 cup green enchilada sauce, and 1 cup of sour cream. Stir to combine. Add the diced chicken and fold together until combined. 

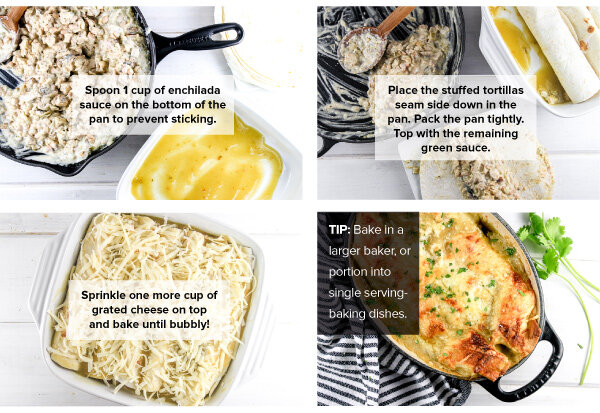
4. Spoon 1 cup of enchilada sauce around the bottom of the pan. This recipe makes about 8 enchiladas which can fit into a standard 9x12 casserole pan, or individual sized dishes that fit 2 enchiladas each. 

5. Fill the tortillas with a scoop of the chicken mixture and roll up tightly. Place the stued tortillas seam side down in the pan. Pack the pan tightly. 

6. Spoon more enchilada sauce on top of the rolled tortillas. Sprinkle one more cup of grated cheese on top. 

7. Bake for 20-25 minutes or until the cheese has started to brown and the enchiladas are bubbling hot. 

8. Serve warm with your choice of garnishes.

Summer Rolls with Spicy Peanut Sauce

Summer_Rolls_V1_01.jpg

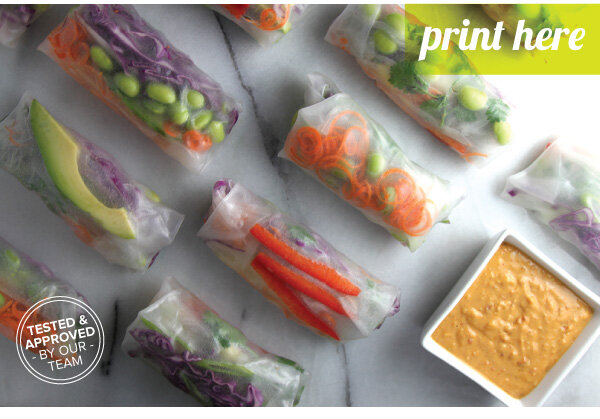
Avoid turning on your stove or oven - make fresh summer rolls for dinner instead! A fun alternative to a salad, rice paper wrapped “summer rolls” are a delicious way to eat a healthy serving of summer vegetables. Bring these colorful summer rolls with spicy peanut sauce to the table – they will be eaten up in no time!

Avoid turning on your stove or oven - make fresh summer rolls for dinner instead! A fun alternative to a salad, rice paper wrapped “summer rolls” are a delicious way to eat a healthy serving of summer vegetables. Bring these colorful summer rolls with spicy peanut sauce to the table -- they will be eaten up in no time!
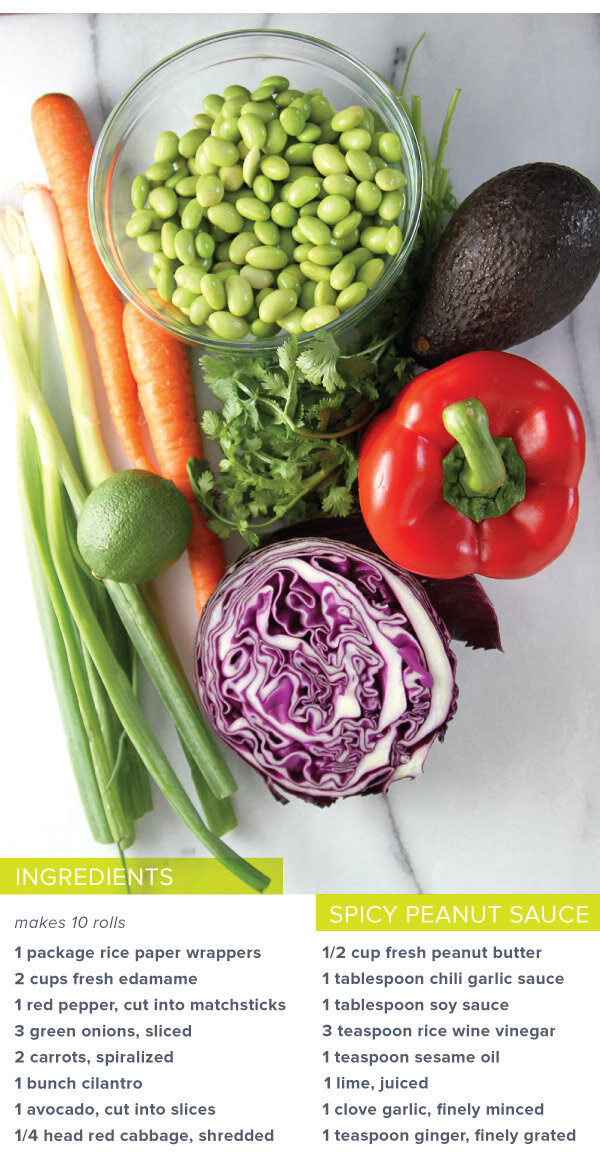
Ingredients:
1 package rice paper wrappers
2 cups fresh edamame, shelled (or thawed frozen edamame)
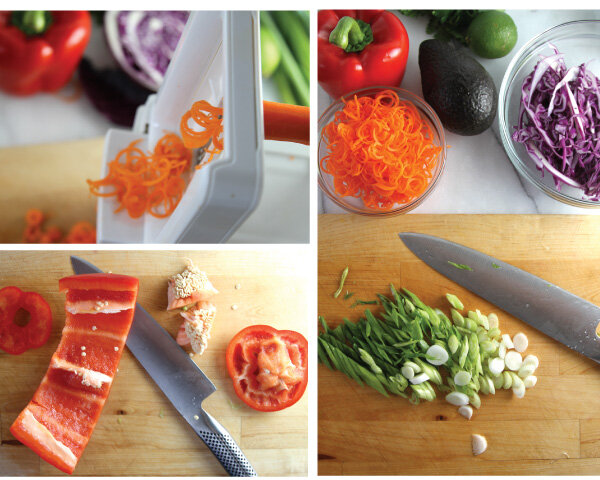
1 red pepper, cut into matchsticks
3 green onions, sliced
2 carrots, spiralized
1 bunch cilantro leaves
1 avocado, thinly sliced
1/4 red cabbage, thinly sliced

Spicy Peanut Sauce:
1/2 cup fresh peanut butter
1 tablespoon chili garlic sauce
1 tablespoon soy sauce
3 teaspoon rice wine vinegar
1 teaspoon sesame oil
1 lime, juiced
1 clove garlic, finely minced, or crushed
1 tsp ginger, finely minced, or grated

Directions:
1. Prepare all of the vegetables and stage in individual prep bowls.
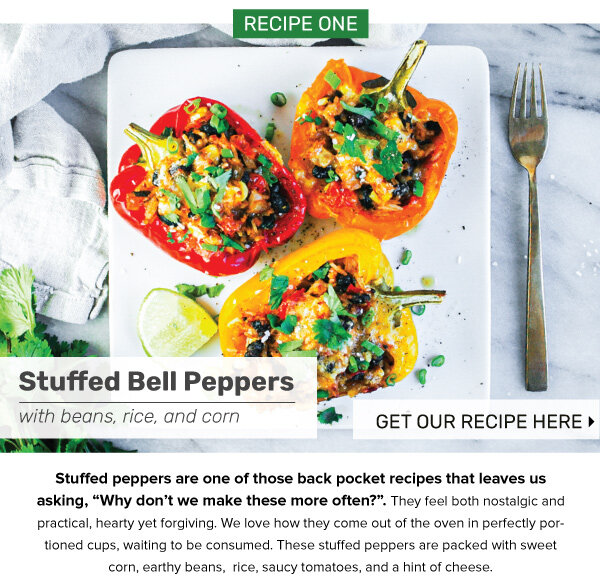
2. Whisk together all of the sauce ingredients, thinning with water, as needed.

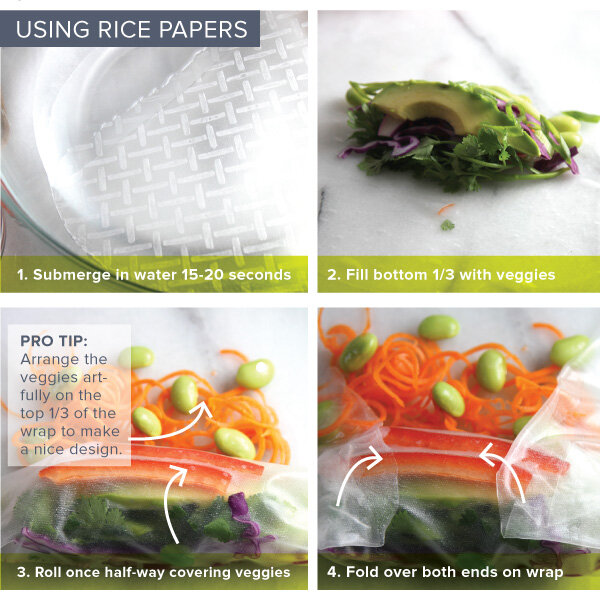
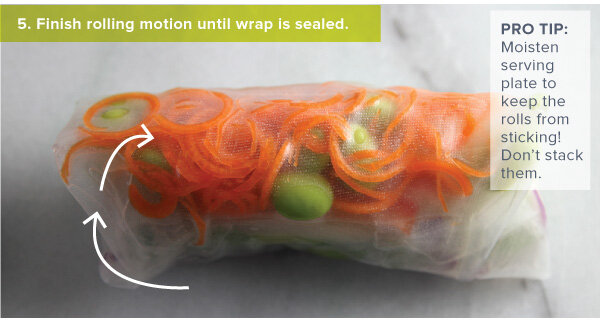
3. Singly, submerge the rice wrappers in water for 15-20 seconds each, then artfully fill with the vegetables. Fill the bottom 1/3 of the wrapper with veggies, leaving a generous margin to each side. Roll once half-way covering veggies. Place additional vegetables in the top 1/3 taking care to artfully place so that a beautiful pattern may be seen on the top 1/3 of the wrap. Fold over both sides on wrap. Finish the rolling motion until the wrap is fully rolled and sealed.
4. Slightly moisten a serving plate, and place the rolls on the plate in a single layer (not touching). Refrigerate for a short time or enjoy them immediately. (They will not keep moist for very long, so enjoy them soon!

5. Serve the rolls whole or cut in half with a personal serving of sauce on the side.

They're Here! Summer Vegetables Ready to Stuff

StuffedVeggies_v2_01.jpg

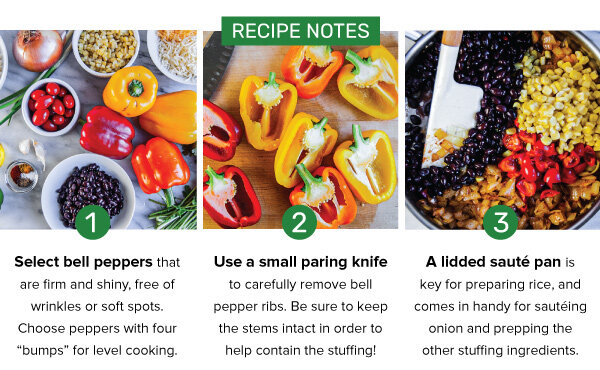
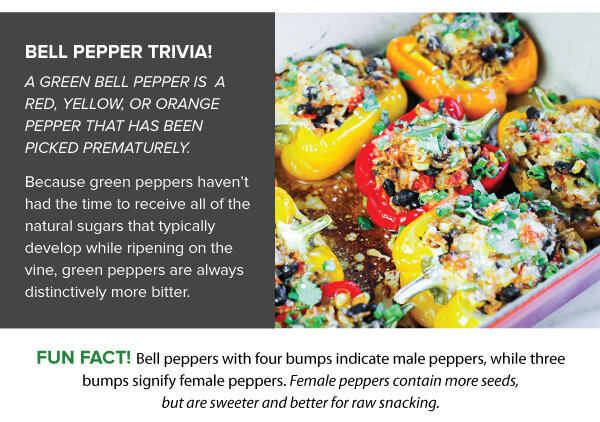
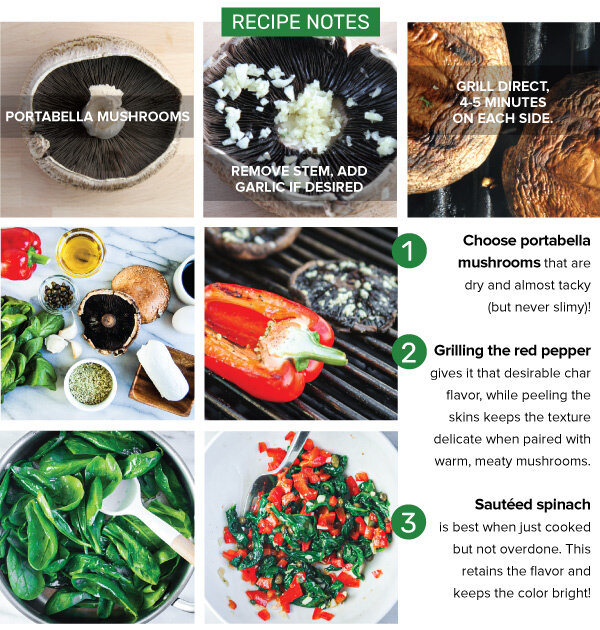
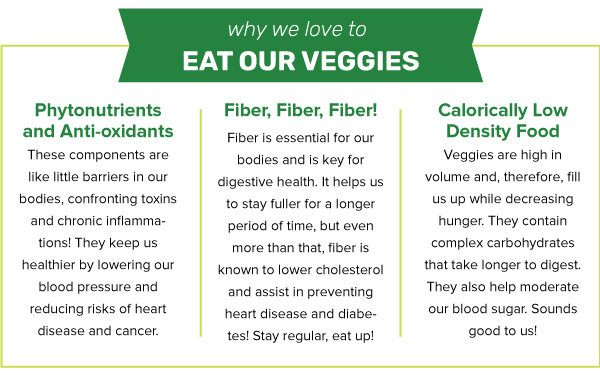
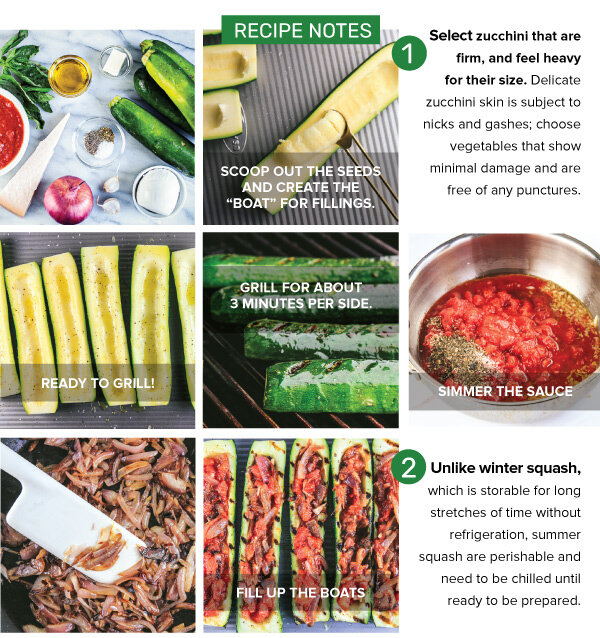
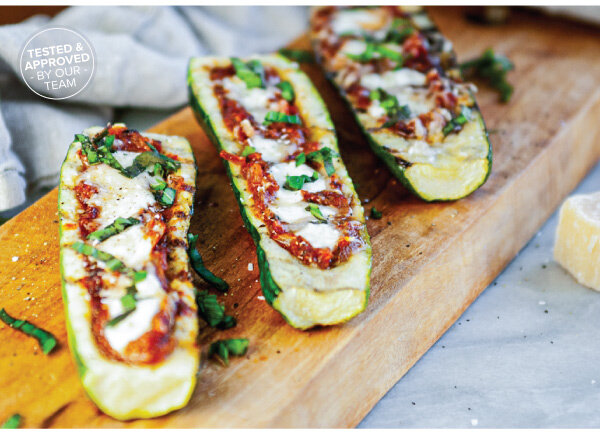
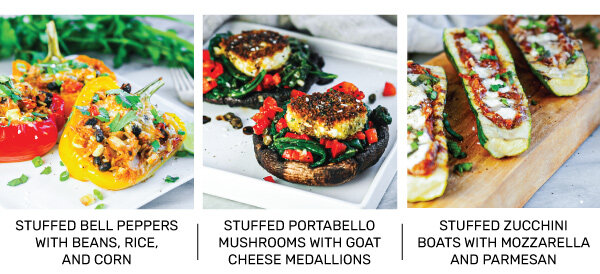
We're taking advantage of the fresh harvests found at farmers' markets, in our gardens, and at roadside stands, and are making scrumptious stuffed vegetables ready to satisfy any craving! 

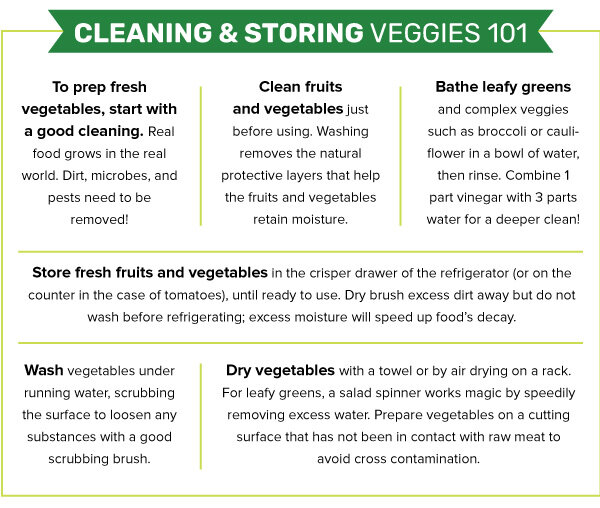
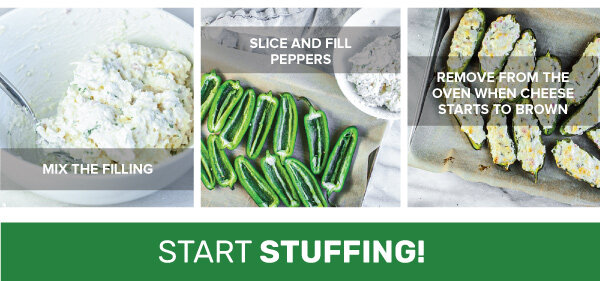
IN THIS ISSUE, we stuff peppers, mushrooms, and zucchini while sharing tips for cleaning veggies properly. PLUS, a bonus recipe, stuffed jalapeños!

Three Super Tasty, Herbalicious Green Sauces

Green_Sauces_v1a_01.jpg

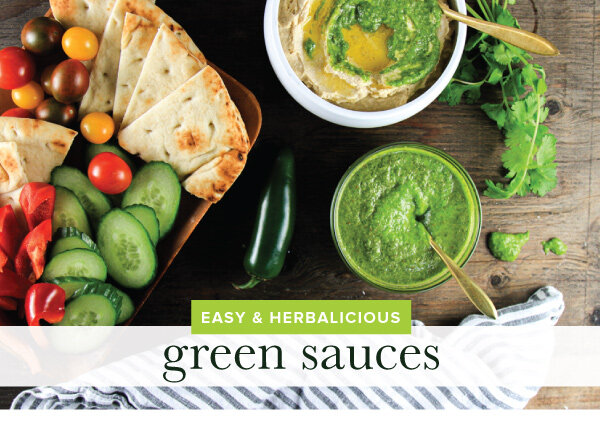
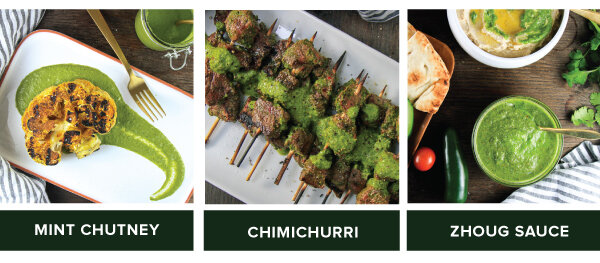
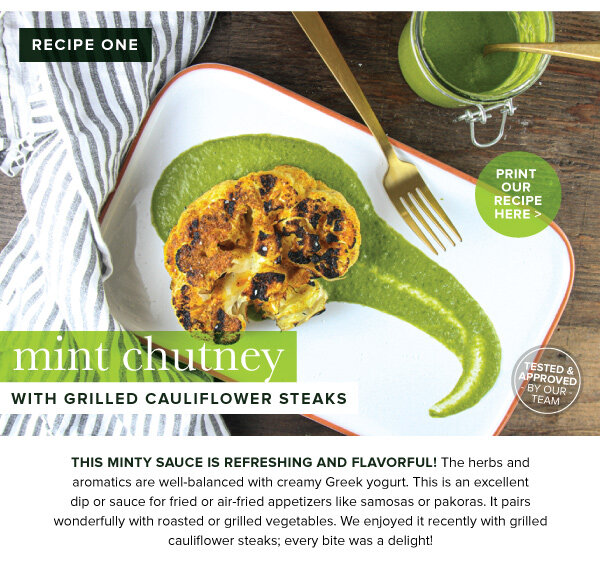
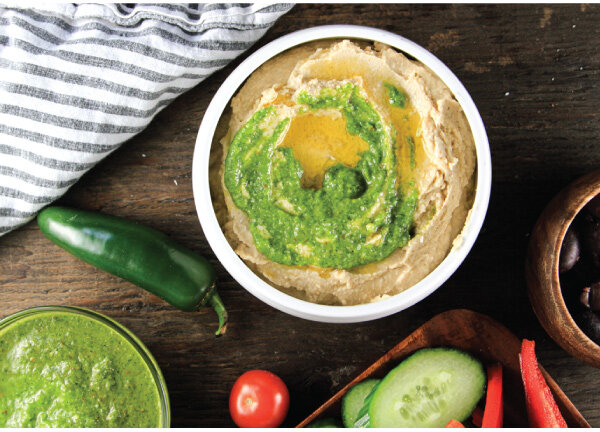
Fresh herbs are a great way to add flavor and complex character to the dishes we cook. Ranging from subtle to dominant, from complementary to defining, the availability of summer herbs is upon us! IN THIS ISSUE, we feature three, green herb-based sauces that originate from different parts of the world. Try them -- they’ll bring big flavor impact to your table!

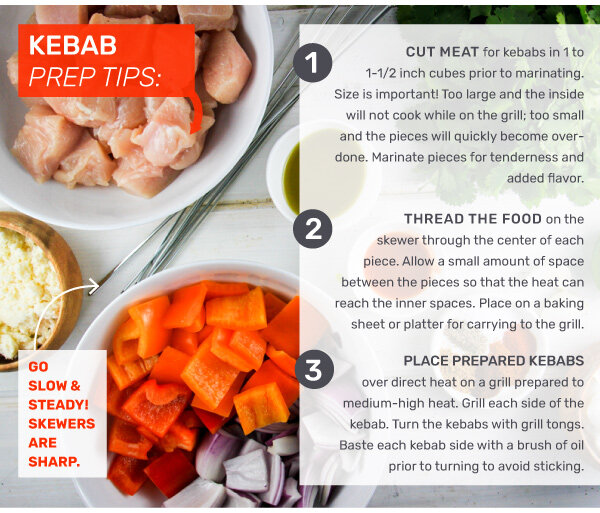
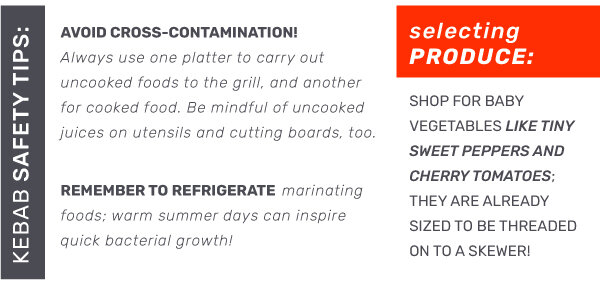
Tips for Grilling Kebabs! PLUS, Three Delicious Recipes

Kebabs2020_v2_01.jpg

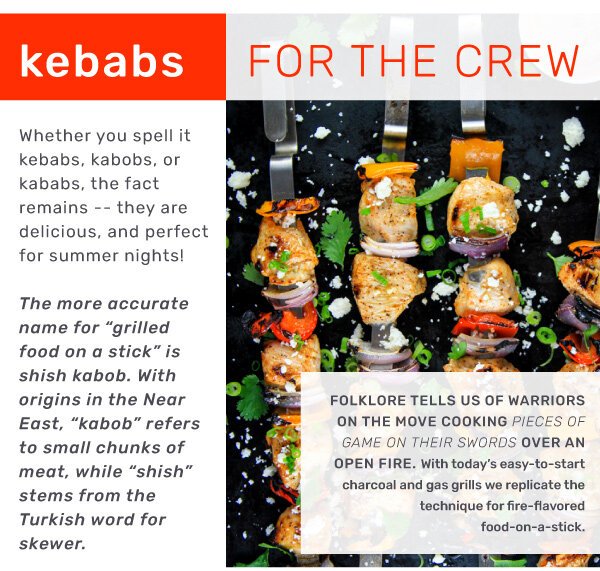
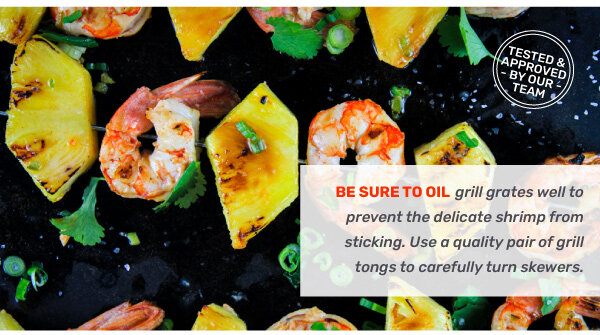
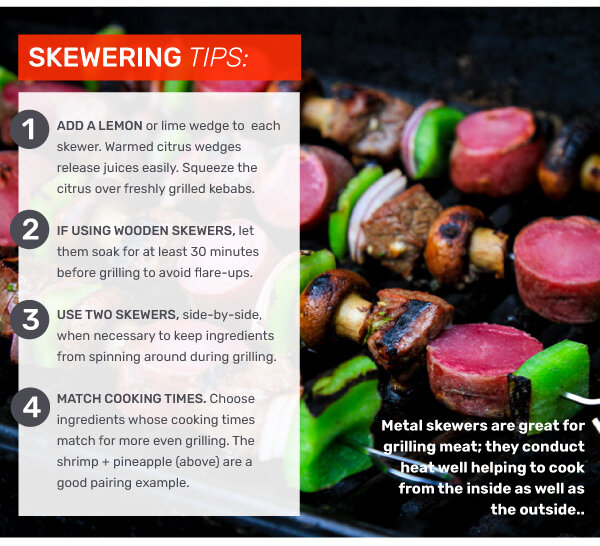
The warm summer nights are a constant invitation to light up the grill. The grill anchors the outdoor kitchen, and becomes the center for al fresco dining and leisurely time spent with the family.

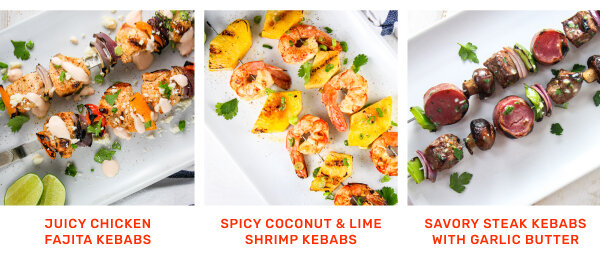
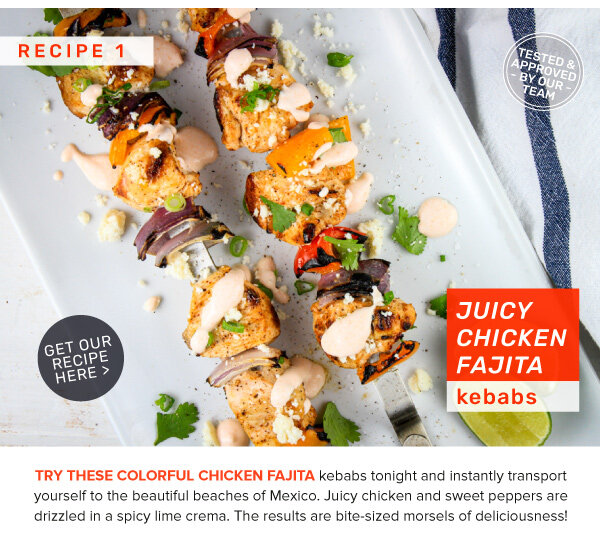
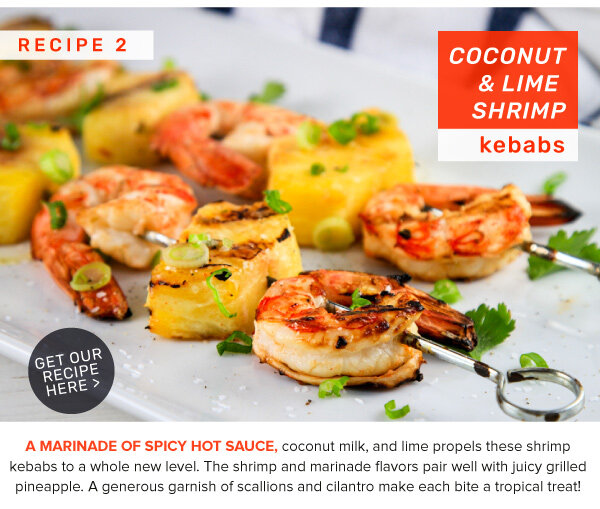
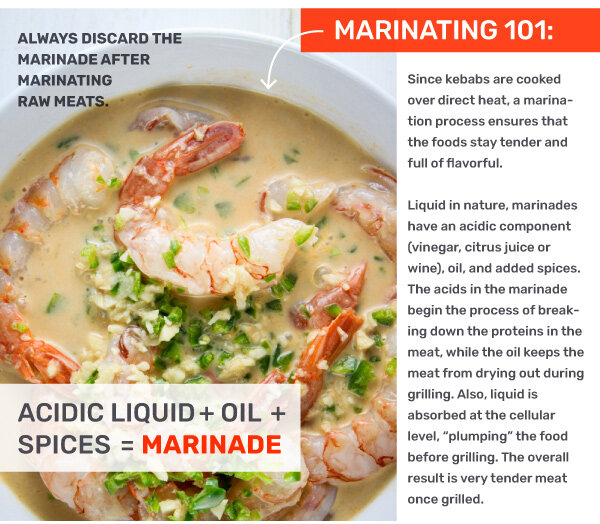
IN THIS ISSUE, we're grilling colorful kebabs made extra-delicious thanks to mouth-watering marinades. Try skewering up one of these three kebab recipes for a tasty summer supper on the grill.

Fresh Inspiration! Huevos Rancheros for Breakfast, Lunch, or Dinner

Huevos_Rancheros_v2_01.jpg

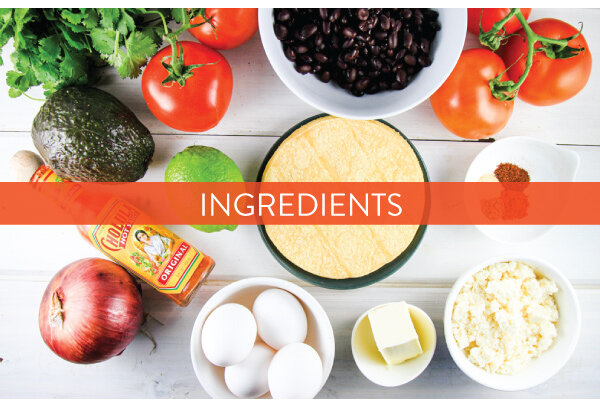
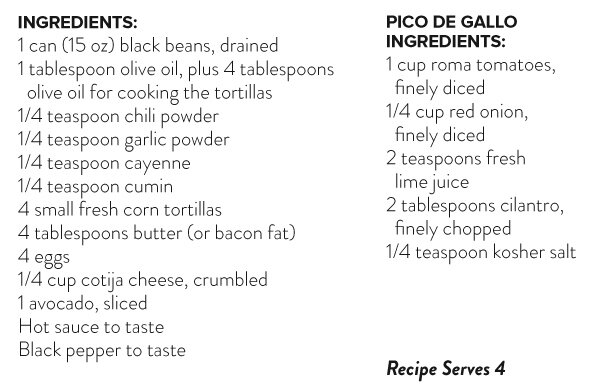
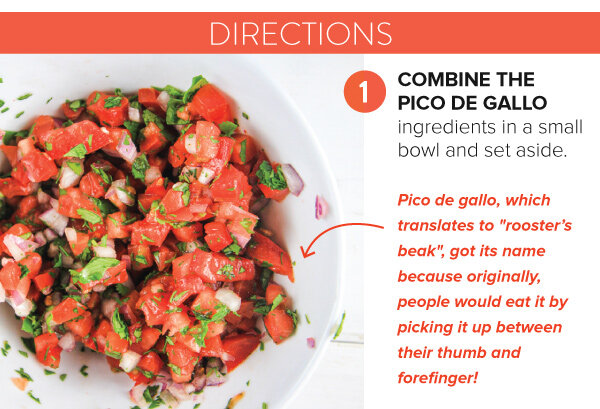
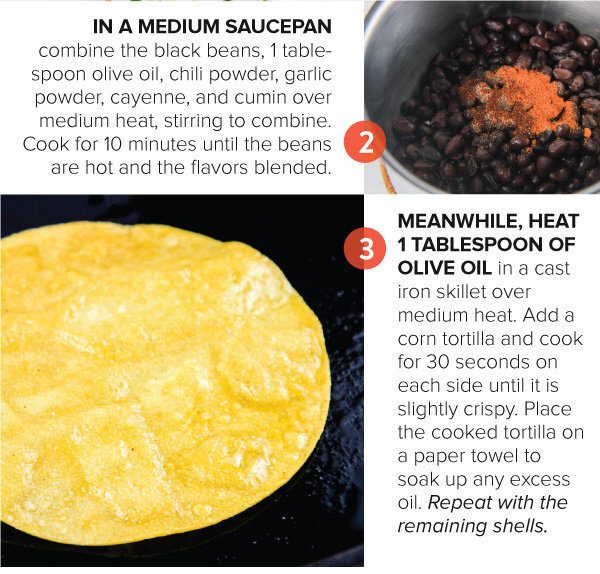
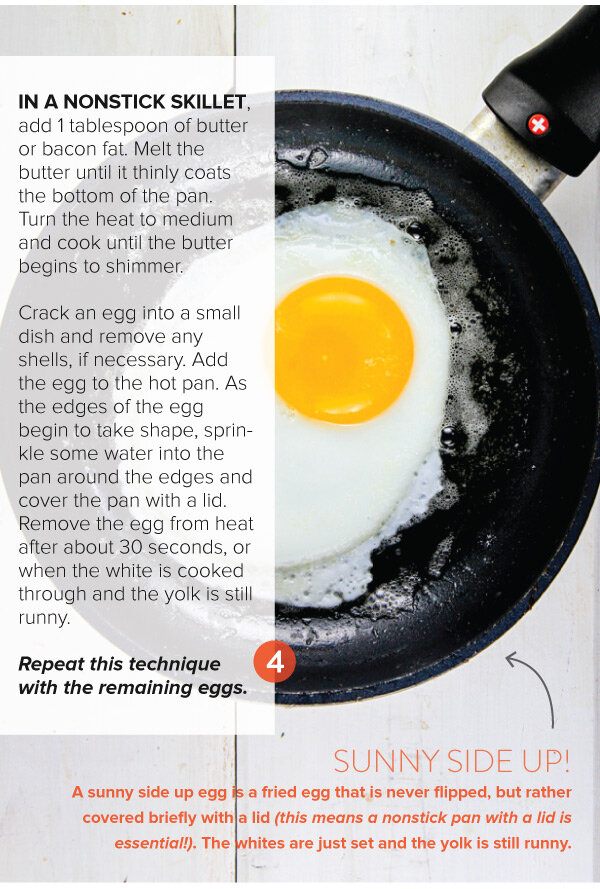
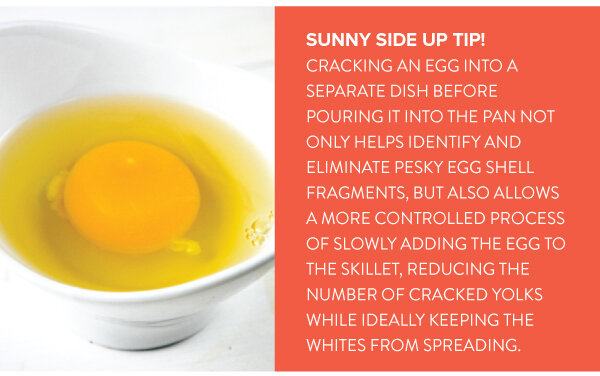
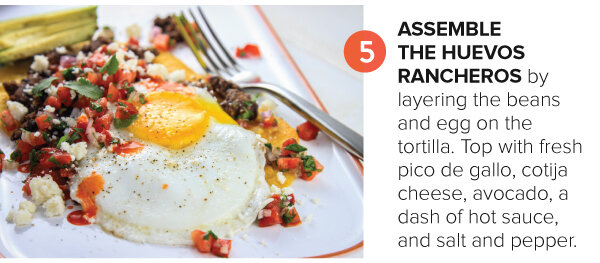
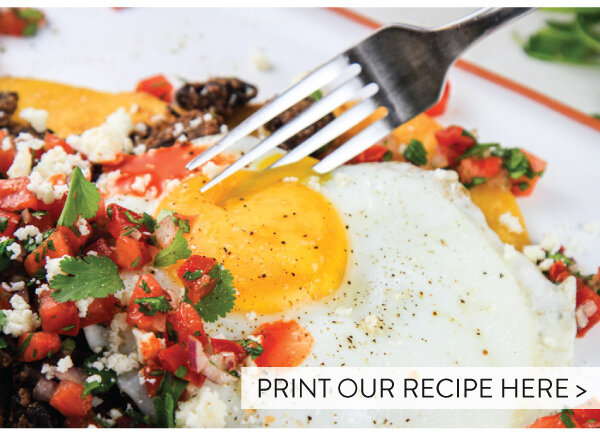
Today we’re featuring flavor-rich huevos rancheros. It’s a great dish to enjoy for any meal of the day. This classic Mexican breakfast translates to “ranch eggs” and highlights a perfectly fried egg served on a warm tortilla with black beans, cotija cheese, and fresh pico de gallo. Enjoy!

Build a Healthy Meal with Dinner Bowls

DinnerBowl2020_v1_01.jpg

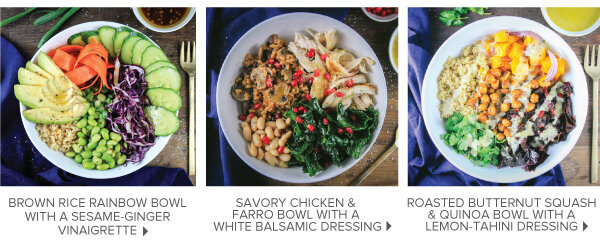
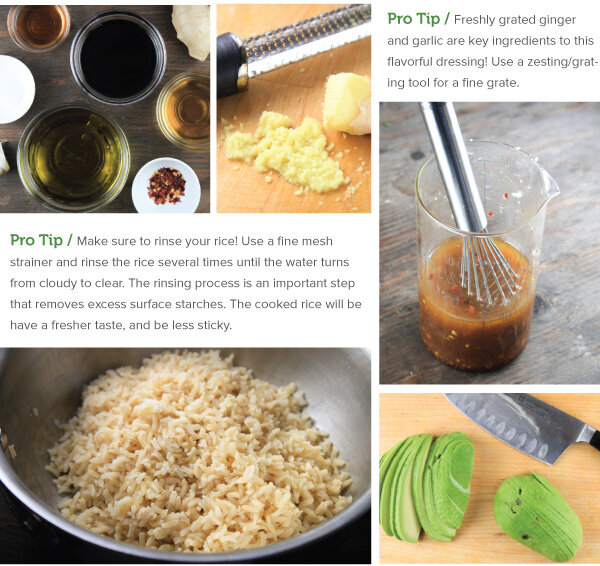
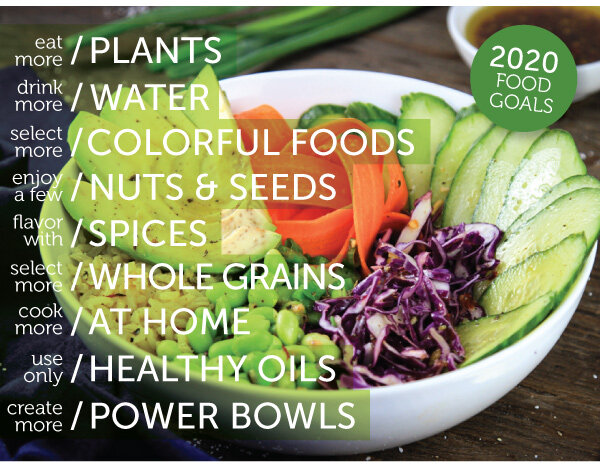
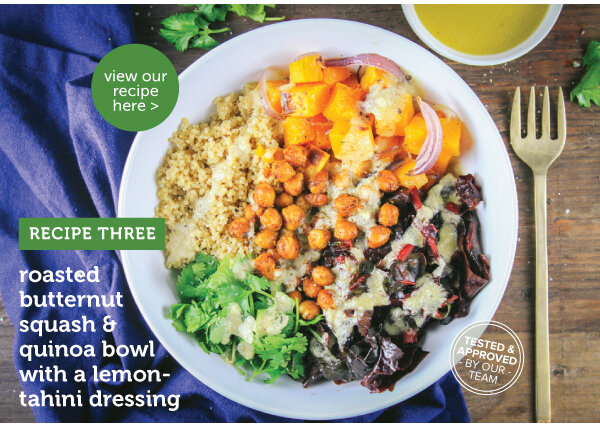
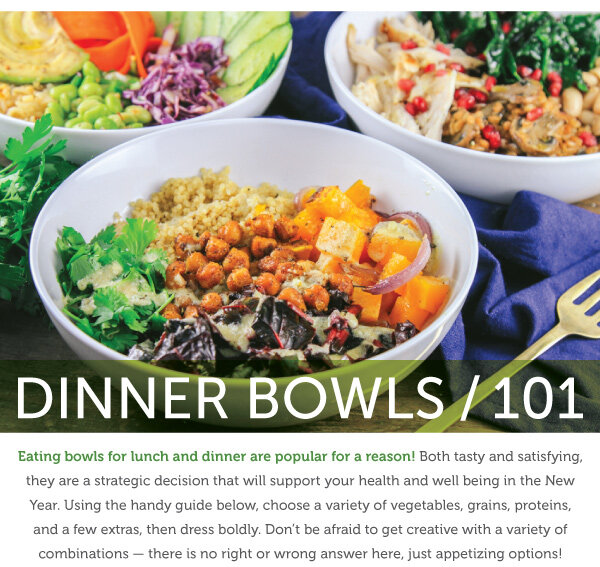
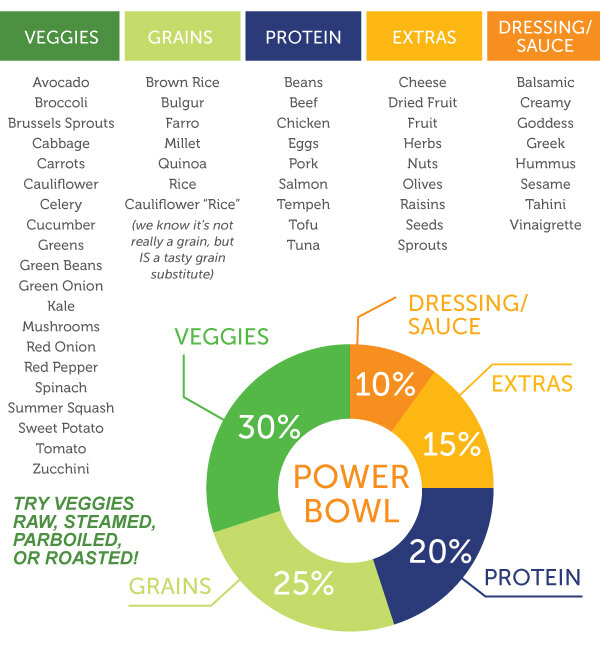
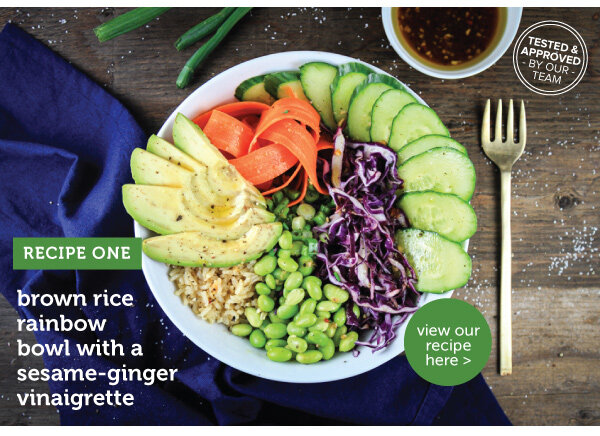
Loaded with more energizing goodies than a traditional salad, the trend of "healthy bowls" is a delicious and filling answer to "what's for dinner?" We like to carefully prepare our ingredients, and arrange them artfully in little clusters for curated bites of tasty awesomeness. IN THIS ISSUE, we present three super healthy recipes featuring an array of vegetables, protein sources, whole grains, and very flavorful dressings. Cheers to a healthy and wholesome New Year!