cheese

Pea Pesto Pasta

Pea_Pesto_v2_01a.jpg

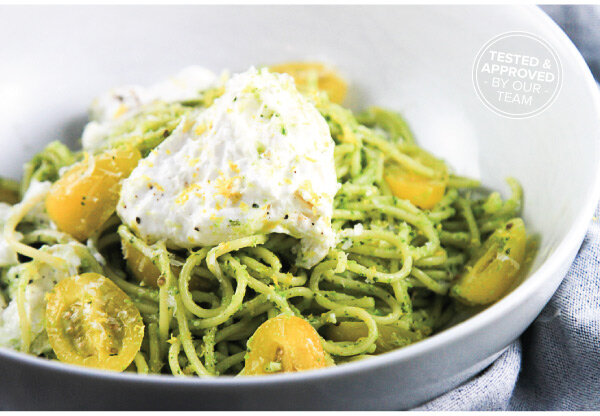
A good pasta dish can transform everyday ingredients into something extraordinary any day of the week. Springtime flavors inspire this fresh take on pasta. We think your family will love this super-quick, spring pea pesto pasta dish. Buon appetito!

Spring Pea Pesto Pasta
Serves 4

Spring Pea Pesto Ingredients:
1/2 cup frozen peas
1/4 cup Parmesan cheese
1/2 teaspoon Kosher salt
1/4 teaspoon freshly ground black pepper
1/4 teaspoon crushed red pepper flakes
1/2 cup olive oil
1/2 cup packed fresh basil leaves
1 tablespoon packed fresh mint leaves
juice of 1/2 lemon (about 2 tablespoons)
1 small clove fresh garlic

Pasta:
1 lb thin spaghetti

Garnish:
1 pint Sun Gold tomatoes, halved
8 oz burrata cheese
Mint leaves, chiffonade
Basil leaves, chiffonade
Lemon zest

Directions:
1. Gather all of the pesto ingredients together. Be sure to thoroughly wash all of the fresh herbs! Pulse the pesto ingredients together in a food processor. Taste test the pesto, and adjust the salt and pepper accordingly. If needed, add more olive oil for a thinner consistency. Enjoy pesto immediately, or keep covered and refrigerated (or even frozen) until ready to use.

2. Slice the tomatoes in half with a small paring knife. Roll the basil and mint leaves and cut in a chiffonade cut for a garnish.

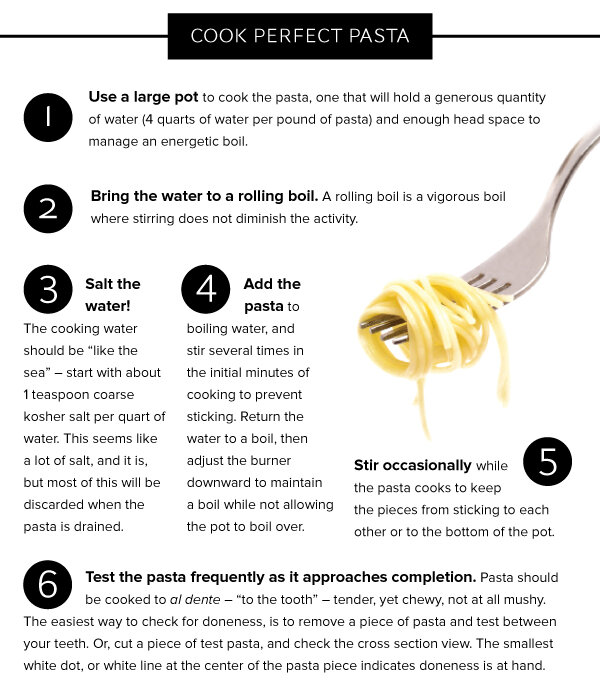
3. Cook the pasta according to the package instructions. Drain, reserve about 1 cup of the pasta cooking water. For better pasta, salt the water! The cooking water should be “like the sea” – start with about 1 teaspoon coarse kosher salt per quart of water. This seems like a lot of salt, and it is, but most of this will be discarded when the pasta is drained. Test the pasta frequently as it approaches completion. Pasta should be cooked to al dente – “to the tooth” – tender, yet chewy, not at all mushy. The easiest way to check for doneness, is to remove a piece of pasta and test between your teeth. Or, cut a piece of test pasta, and check the cross section view. The smallest white dot, or white line at the center of the pasta piece indicates doneness is nearly at hand.

4. Mix the pesto with the drained and cooked pasta, stir with tongs until the pasta is well-coated with the pesto. Add reserved pasta water, to thin the sauce, if needed. 5. Garnish the pasta with the tomato halves, pieces of fresh burrata, mint, and basil leaves. Enjoy!

Classic Potato and Leek Gratin

Potato-Leek-Gratin_V3_01.jpg

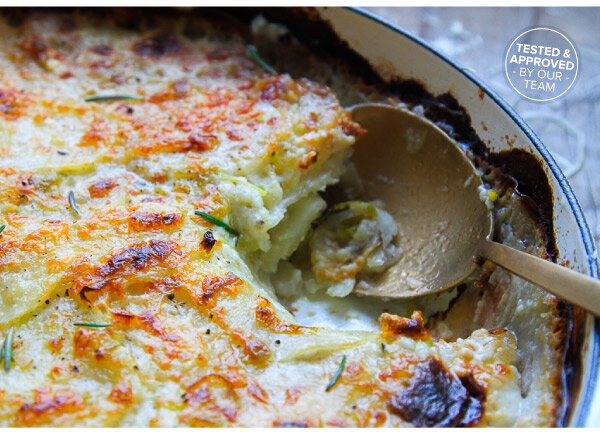
In this classic dish, thinly sliced potatoes are layered with a distinctive Mornay sauce. Mornay sauce is a Béchamel sauce with the addition of Gruyère cheese. The additions of savory leeks, garlic, and rosemary combine in a wonderful way in the sauce to infuse flavor into every bite. This recipe is a warm, comforting side dish, or hearty enough for the main event!

Classic Potato & Leek Gratin
Serves 6 - 8

Ingredients:
2 lbs Idaho potatoes (about 7-8 potatoes), washed, peeled, and thinly sliced with a mandoline
5 tablespoons butter, divided
3 small leeks, green parts removed, finely sliced
1 tablespoon rosemary, minced
4 cloves garlic, minced
1/4 cup all-purpose flour
3 cups whole milk
2 teaspoons kosher salt
1/4 teaspoon black pepper
1-1/2 cup grated Gruyère, plus
2 tablespoons reserved as topping

Directions:
1. Preheat the oven to 400°F.

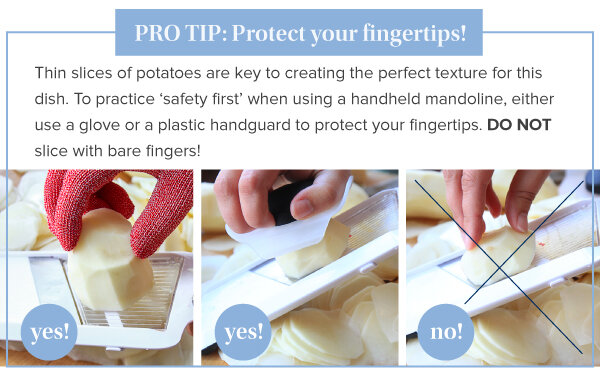
2. Prep the potatoes. Use a sharp peeler to peel the potatoes. Rinse off, and then slice into 1/8” slices using a handheld mandoline.

3. In a large saucepan, melt 1 tablespoon butter and cook the leeks over medium heat until they are translucent, about 10 minutes. Add the rosemary and garlic and cook for about another 3 minutes.

4. Prepare the roux. In a separate, small saucepan, heat the remaining 4 tablespoons of butter. Once the butter has melted, whisk in the flour until the mixture is completely smooth. Continue cooking for about 1-2 minutes. This process removes the raw flour flavor and helps create a silky sauce.

5. Create a Béchamel sauce by very slowly pouring milk into the roux, continue whisking the mixture until the sauce is smooth. Add in the salt and pepper and continue whisking over medium-low heat for 3-5 minutes until the sauce thickens and becomes very creamy.

6. Transform the sauce into a Mornay sauce by slowly adding in the Gruyère cheese. Continue cooking and whisking for a few more minutes until the sauce is smooth, and the cheese is well incorporated. Add the cooked leeks mixture to the sauce.

7. Layer the gratin. Butter the bottom and sides of a large baking dish and lay a single layer of potatoes. Pour some of the sauce over the potatoes and continue to layer the potatoes, pouring more sauce at each layer. Repeat this step until all of the potatoes are used (or you get to within 1/2” from the top of your dish).

8. Coat the final layer of potatoes with sauce and sprinkle with the reserved cheese.

9. Cover the gratin with a tight fitting lid or foil and bake for 60 minutes. Remove the lid or foil, and continue to bake for another 10 minutes, or until the top turns golden brown.

10. Garnish with additional fresh pieces of rosemary, and serve hot.

Deep Dish Pizza

DeepDishZa_v2_01.jpg

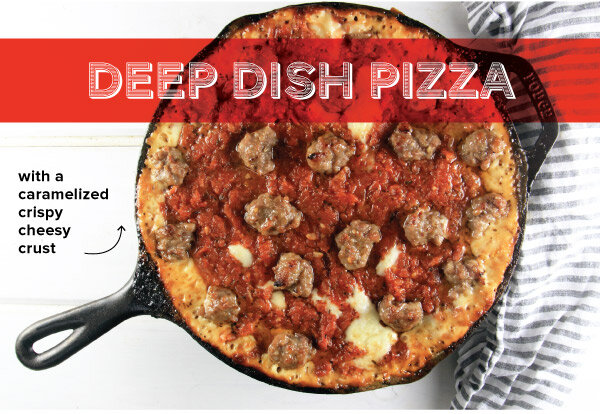
Who doesn’t love pizza??? Tonight it’s deep dish pizza on the menu! This deep dish version of pizza is inspired by a few unique pizza places that feature a partial cheese crust. Inside, delicious layers of flavor are assembled into some sort of pizza heaven. Fresh dough is topped with a layer of cheese, red onions, a robust red sauce, and finally, a hearty serving of spicy sausage - one slice is nearly enough!

Deep Dish Pizza - Sausage & Red Onion with a Crispy, Caramelized, Cheesy Crust
Makes two 12-inch deep dish pizzas - Serves 8

Dough Ingredients:
3/4 cup warm water
2-1/4 teaspoons (or one packet) yeast
1 tablespoon sugar
1 teaspoon kosher salt
2 tablespoons olive oil
2 tablespoons butter, melted
2-1/2 cups all-purpose flour

Pizza Toppings:
1 lb low-moisture mozzarella cheese, sliced in 1/8"-thick slices
8 ounces parmesan cheese, shredded
1 pound sausage, roughly rolled into 1" bite-sized discs
1/2 red onion, thinly sliced

Sauce Ingredients:
2 cloves garlic, minced
2 tablespoon olive oil
1 (28 oz) can petite diced tomatoes
1 (14oz) can crushed tomatoes
1 (6 oz) can tomato paste
2 teaspoons dried basil
2 teaspoons dried oregano
1 teaspoon dried marjoram
1/4 teaspoon fresh ground pepper
1 teaspoon Kosher salt
1 tablespoon sugar

Directions:
1. Prepare the pizza dough by hand or by using a stand mixer. Pour the warm water into a large bowl, and add the yeast. Stir slowly for about two minutes, then add the sugar, salt, olive oil, and melted butter and stir again until combined. Add 1 cup of flour, and stir until combined. Slowly add the remaining 1-1/2 cup of flour until a dough ball has formed. Knead the dough several times until a smooth ball has developed. Cover the dough with a damp cloth and let the dough rise in a warm location for about 1-1/2 hours.

2. Meanwhile, prepare the sauce. Sauté the garlic with the olive oil, stirring until fragrant. Be sure to watch this step carefully so that the garlic doesn't burn! Once the garlic is fragrant, add the diced tomatoes, crushed tomatoes, tomato paste, basil, oregano, marjoram, pepper, salt, and sugar. Bring the sauce to a low simmer and cook stirring as needed for 40-45 minutes or until the sauce has thickened nicely.

3. Use two well-seasoned 12" cast iron pans or deep dish pizza pans. Cover the surface with a generous layer of canola oil on the bottom and sides. Press the dough into the cast iron as a single flat layer and let the dough rise for an additional 30 minutes in the pan. (You can freeze half the ingredients for later.)

4. Preheat the oven to 500 degrees F.

5. Once the dough has risen in the pan, it's time to assemble the pizza. Make a layer of folded mozzarella slices all along the edge of the pan creating a "cheese crust" and then continue to layer on top of the layer of dough. Add the shredded parmesan on top of the mozzarella.

6. Spread the sliced red onions around the pizza on top of the cheese layers.

7. Add a hefty layer of pizza sauce to the pizza covering the onions completely.

8. Finally, top with pizza with the sausage discs.

9. Line a large baking sheet with aluminum foil to place on the oven rack directly below the pizza to catch any drips as the pizza cooks. Turn on a ventilation fan, and perhaps even crack a window. Any cheese that spills over will make a bit of a smoke.

10. Tent a loose piece of aluminum foil over the pizza. Bake for 20 minutes.

11. Check to make sure that the drip pan is correctly aligned to catch any spillage and continue baking for an additional 20-25 minutes or until the pizza crust is well set, the sausage is cooked, and the sauce and cheese below are bubbling hot. The sides of the crust that are made of cheese might look blackened, but they should not taste burnt, instead they will taste of delightful caramelized cheese and help to hold all of the ingredients in place.

12. Let the pizza cool slightly, enough to slide it from the pan onto a parchment paper-lined cutting board. Cut the pizza into slices with a sharp cook's knife working from the cheesy edge into the middle.

13. Pace yourself when enjoying - one pizza is hearty! One 12-inch pizza serves 4 hungry adults.

Green Chile & Cheese Egg Bake Bites

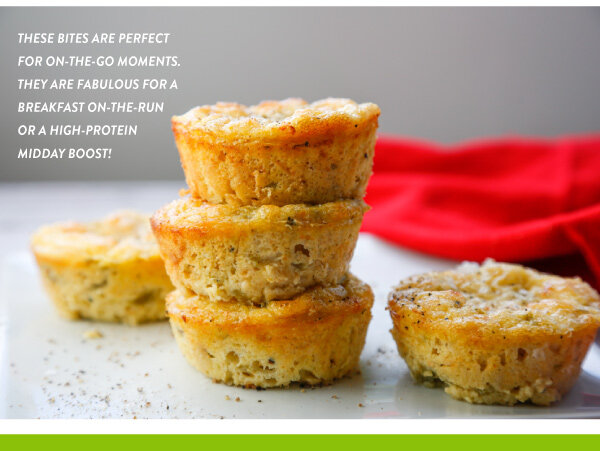
Holiday preparations are in full swing, and that means busier mornings and weekends.  We find ourselves searching for protein-packed recipes that come together in a snap. These featured savory egg bake bites are just that! IN THIS ISSUE we share our favorite recipe for petite-sized breakfast bites, along with tips on how to crack an egg one-handed. 

Green Chile & Cheese Egg Bake Bites
Makes 12 egg bites

Busy mornings are the norm! We often find ourselves searching for satisfying, protein-packed recipes that come together in a snap to help us approach the day with some solid nourishment. You’ll find that these savory egg bake bites are just that -- delicious, satisfying, and easy!

Ingredients:
1/2 cup butter, melted, plus 2 tablespoons softened
1/4 cup flour
1/2 teaspoon baking powder
1/4 teaspoon Kosher salt
1/2 teaspoon pepper
1/2 teaspoon paprika
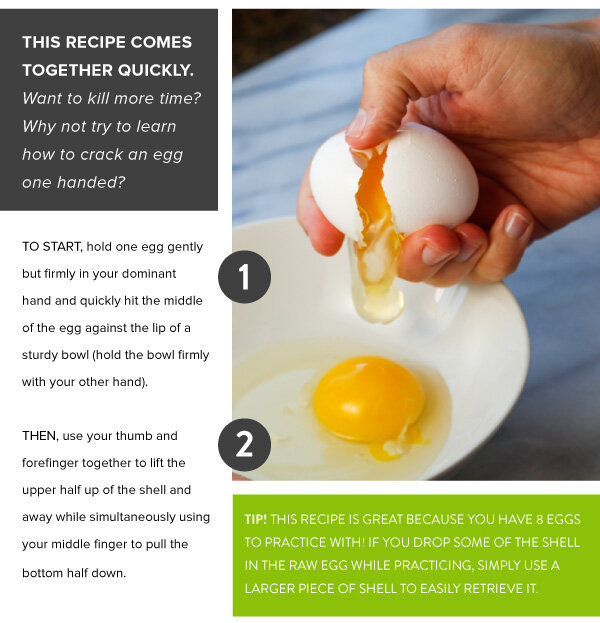
8 eggs
3/4 cup small curd cottage cheese
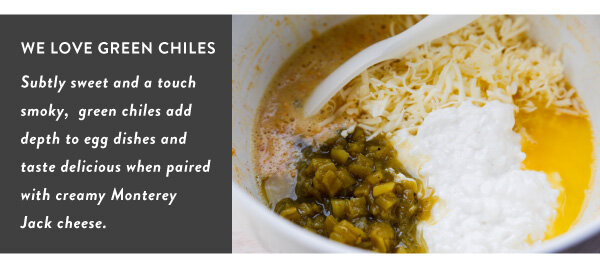
7 oz can chopped green chiles
2 cups grated Monterey Jack cheese (about 8 oz)

Directions:
1. Preheat the oven to 350°F. Generously butter the cups of a standard-sized mun pan with the softened butter.

2. In a medium bowl, mix together the flour, baking powder, salt, pepper, and paprika.

3. In a large bowl, whisk the eggs. Slowly add the dry ingredients to the egg mixture and whisk to combine.

4. Stir in the melted butter, cottage cheese, green chiles, and Monterey Jack cheese and continue stirring until the ingredients are incorporated.

5. Use a measuring cup to evenly distribute the egg mix into the 12 prepared cups of the mun pan.

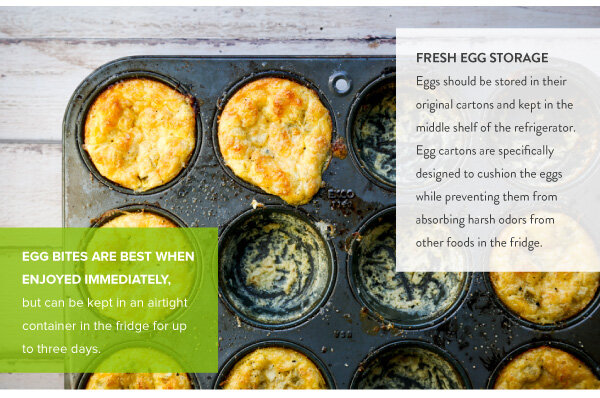
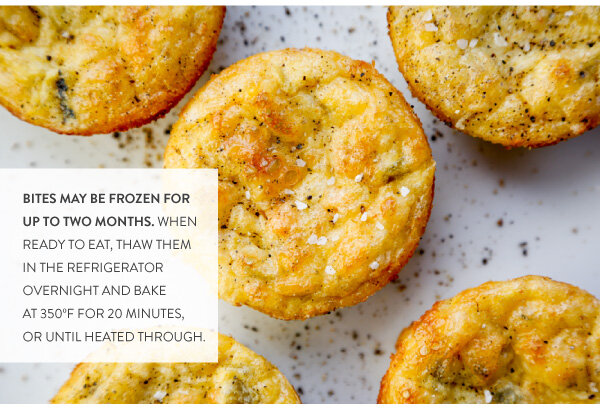
6. Bake until set, about 20-25 min. Let the egg bake bites cool in the pan before removing. Eat while warm or store in the refrigerator for 3 days in an air-tight container, or wrap well and store in the freezer for up to two months.

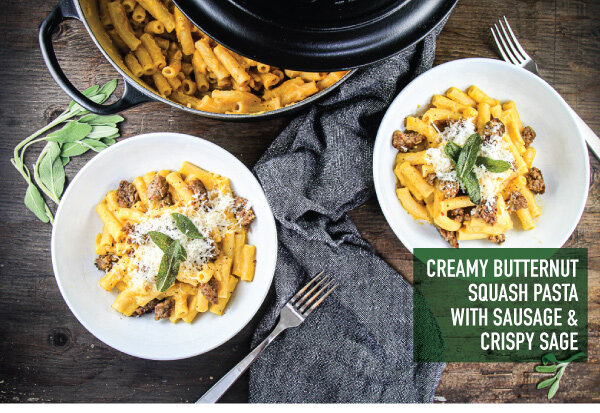
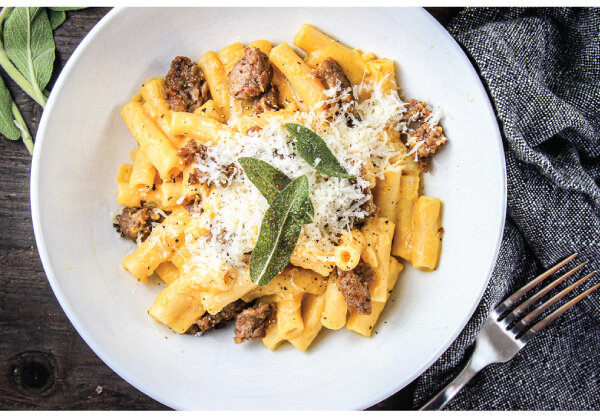
Creamy Butternut Squash Pasta with Sausage and Crispy Sage

Fall flavors unite in a most delightful way in this creamy, dreamy pasta!

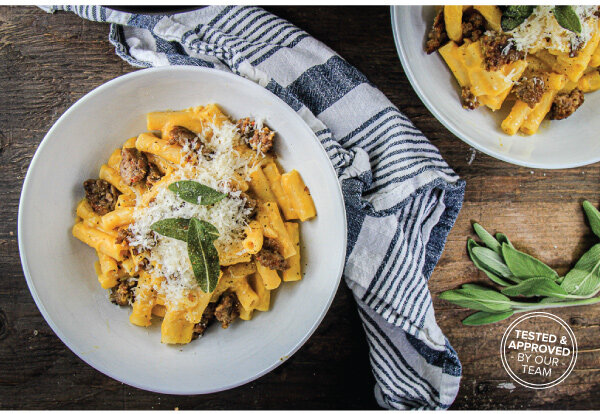
IN THIS ISSUE, butternut squash is transformed into a tasty sauce. The naturally sweet sauce is balanced with spicy sausage, then generously topped with savory cheese and crispy sage leaves. It’s a wonderful kind of deliciousness!

Creamy Butternut Squash Pasta with Sausage and Crispy Sage 
Serves 8 - 10 

Fall flavors unite in a most delightful way in this creamy, dreamy pasta! Butternut squash is transformed into a tasty sauce. The naturally sweet sauce is balanced with spicy sausage, then generously topped with savory cheese and crispy sage leaves. It’s a wonderful kind of deliciousness! 

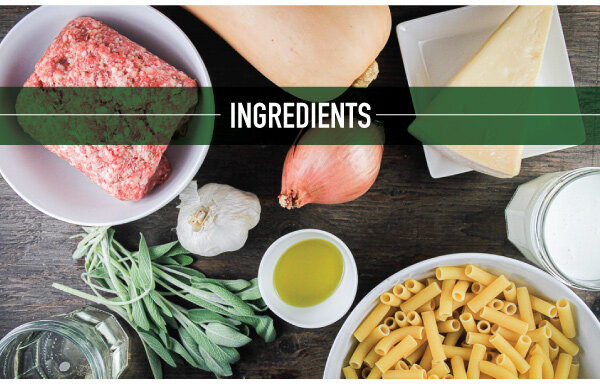
Ingredients: 
1 medium butternut squash, peeled, cut in half, seeds removed 
4 tablespoons butter 
20-25 fresh sage leaves 
1 lb hot Italian ground sausage 
2 tablespoons olive oil 
1 large shallot, finely diced 
2 cloves garlic, minced
1/2 cup white wine 
1 cup heavy whipping cream 
1 teaspoon Kosher salt 
1/2 teaspoon black pepper 
2 lbs pasta, ziti or another tube pasta 

Garnish: 
crispy sage leaves parmesan cheese, shaved or grated

Directions: 
1. Prep the butternut squash: Wash the squash well, cut both ends o the squash to create a flat surface. Peel the squash with a peeler. Slice in half length-wise and scoop out the seeds. 

2. Using a large pasta pot with a steamer basket, steam the butternut squash until it is fork tender, about 30-35 minutes. 

3. Remove the squash and purée with a blender or immersion blender until it is smooth. 

4. Meanwhile, in a large Dutch oven, sauté the sausage into bite-sized chunks until nicely browned. Remove the sausage from the pot. Set aside. Reserve the pot and drippings for the shallots, garlic, and the next steps in sauce making. 

5. Next, in a nonstick skillet, prepare the crispy sage leaves. Melt the butter, then sizzle the sage leaves on each side until just crisp. Place the leaves on a paper towel-lined plate to cool. Reserve the sage butter to sauté the shallot and garlic, and for adding to the sauce. 

6. Using the Dutch oven, add any remaining butter from the sage. Sauté the shallot and garlic until translucent. Add additional olive oil to sauté, as needed. 

7. Once the aromatics are softened, add 1/2 cup of white wine and simmer until the wine is reduced by half. 

8. Add the blended squash to the aromatics and stir until combined. Stir in the heavy cream. Gently simmer the sauce until the pasta is ready. Season with salt and pepper, to taste. 

9. Meanwhile, cook the pasta until al dente, reserve at least 1 cup of the pasta water, then drain well. 

10. Add the pasta to the sauce. Add up to 1 cup of reserved pasta water until the sauce reaches a silky consistency. 

11. Add the sausage to the pasta. Dish the pasta, and garnish with a hearty portion of freshly shaved or grated parmesan cheese. Top each serving with several crispy sage leaves.

Grilled Chicken 3 Ways

Chicken_3ways_v2_01.jpg

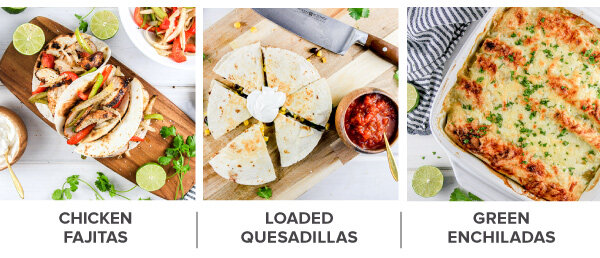
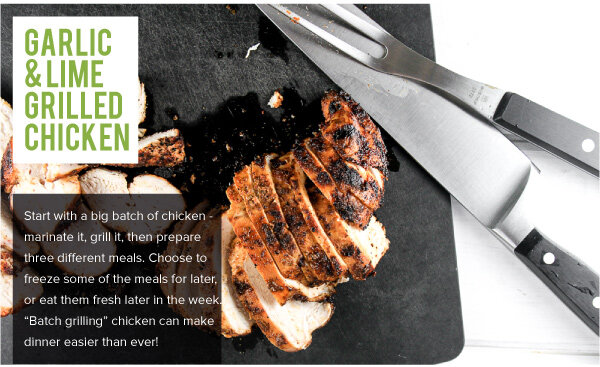
Let's make dinnertime easier! Prepare a big batch of marinated and grilled chicken breasts and then transform that chicken into three delicious meals. IN THIS ISSUE, we feature three easy recipes using grilled chicken - fajitas, quesadillas, and green enchiladas.

Garlic & Lime Grilled Chicken

Garlic & Lime Grilled Chicken:
6 chicken breasts - some now, some later 

Marinade:
1 tablespoon lime zest (about two small limes)
2 tablespoons chili powder
2 tablespoons garlic powder
1 tablespoon paprika
1 tablespoon cumin
1 tablespoon sugar
1 teaspoon pepper
1 teaspoon Kosher salt
1/2 cup vegetable oil
2 tablespoons fresh lime juice

Garlic & Lime Grilled Chicken Directions:
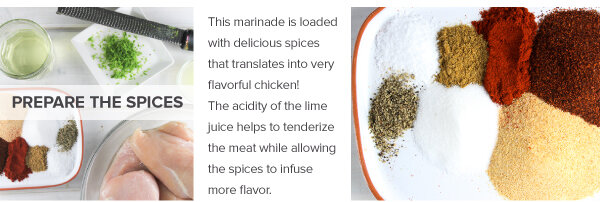
1. In a small bowl, combine the lime zest and the marinade spices: chili powder, garlic powder, paprika, cumin, sugar, pepper, and salt. Stir together until evenly mixed. 

2. Place the chicken breasts in a large bowl or in a sealable bag inside of a large bowl. 

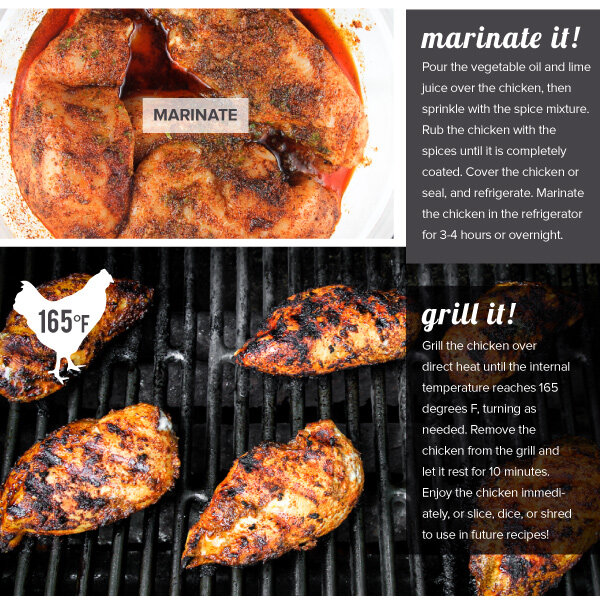
3. Pour the vegetable oil and lime juice over the chicken, then sprinkle with the spice mixture. 

4. Rub the chicken with the spices until it is completely coated. 

5. Cover the chicken and refrigerate. Marinate the chicken in the refrigerator for 3-4 hours or overnight. 

6. Fire up the grill! Heat the grill; ensure your grill grates are clean and well-oiled. 

7. Grill the chicken over direct heat until the internal temperature reaches 165 degrees F, turning as needed. 

8. Remove the chicken from the grill and let it rest for 10 minutes. 

9. Enjoy the chicken immediately or slice, dice, or shred to use in future recipes.


Chicken Fajitas
Serves 4 

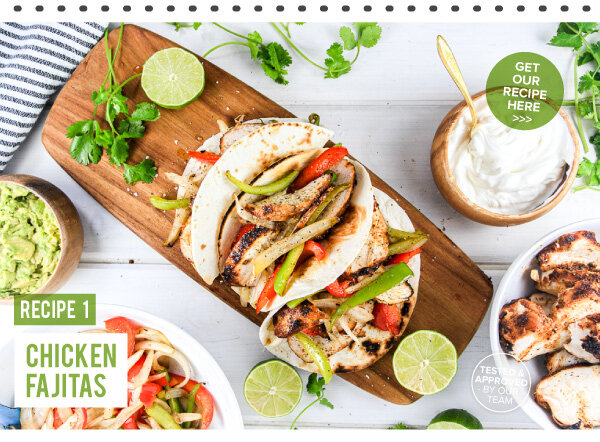
Fajitas are a colorful, delicious, and healthy option for getting dinner on the table quickly! With the chicken already marinated and grilled, simply grill onions and peppers to add to the chicken. Complete the tasty fajitas with an array of toppings! Some of our favorite fajita toppings include sour cream, cilantro, salsa, hot sauce, a squeeze of lime, salsa, and a little guacamole! 

Fajitas:
2 chicken breasts (marinated, grilled, and diced)
4 flour tortillas, warmed
1 red pepper, sliced into strips
1 green pepper, sliced into strips
1 sweet onion, sliced pole to pole
2 tablespoons olive oil
1/2 teaspoon Kosher salt
1/2 teaspoon pepper 

Toppings:
Sour cream
Avocado
Lime wedges
Fresh cilantro leaves
Salsa, and/or hot sauce 

Directions:
1. Prepare the chicken breasts according to the Garlic & Lime Chicken directions above. 

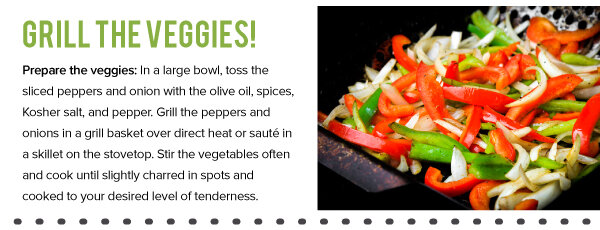
2. Prepare the veggies. In a large bowl, toss the sliced peppers and onion with the olive oil, Kosher salt, and pepper. Grill the peppers and onion in a grill basket over direct heat or sauté in a skillet on the stovetop. Stir the vegetables often and cook until slightly charred in spots and cooked to your desired tenderness. 

3. Toss the cooked vegetables with the grilled chicken slices. 4. Serve with warmed tortillas and a variety of your favorite toppings.


Loaded Chicken Quesadillas
Serves 4 

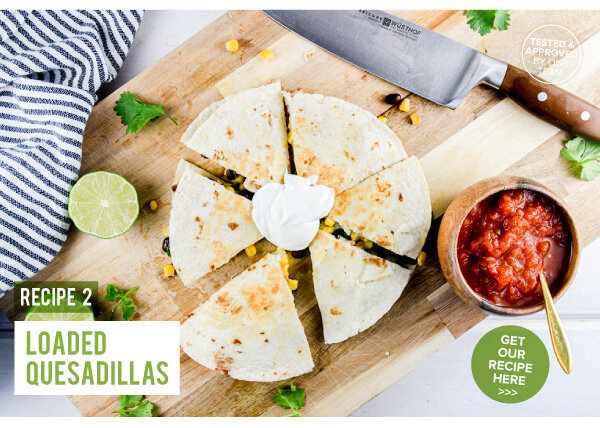
These quesadillas are loaded with grilled and diced chicken, black beans, spinach, corn, and plenty of cheese. We love quesadillas for lunch or dinner. Everyone can customize their order to their own preference. Add additional flavor with a variety of toppings! 

Quesadillas:
2 chicken breasts (marinated, grilled, and diced)
8 tortillas
8 oz pepper jack cheese, grated
1 can (15 oz) black beans, rinsed and drained
8 oz frozen corn, thawed
4 oz spinach leaves 

Toppings:
Sour cream
Avocado
Lime wedges
Fresh cilantro leaves
Salsa
Pickled jalapeños
Hot sauce 

Directions:
1. Prepare the chicken breasts according to the Garlic & Lime Chicken directions above. 

2. Use a panini press or a skillet on the stovetop to cook the quesadillas. 

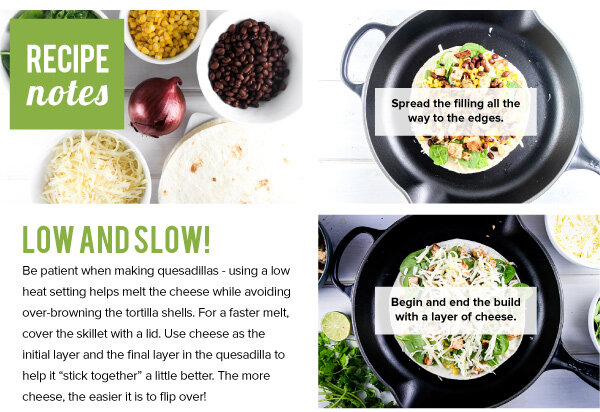
3. Load a tortilla with a layer of pepper jack cheese, then add all of the quesadilla ingredients: diced chicken, black beans, corn, and spinach leaves. Finish with another layer of cheese, then top with another tortilla. 

4. If cooking on the stovetop use low heat and practice patience while the cheese melts! Using a large spatula, flip the quesadilla after the cheese has melted enough to hold it together. 

5. Cut the quesadilla into wedges and enjoy warm with an array of toppings.


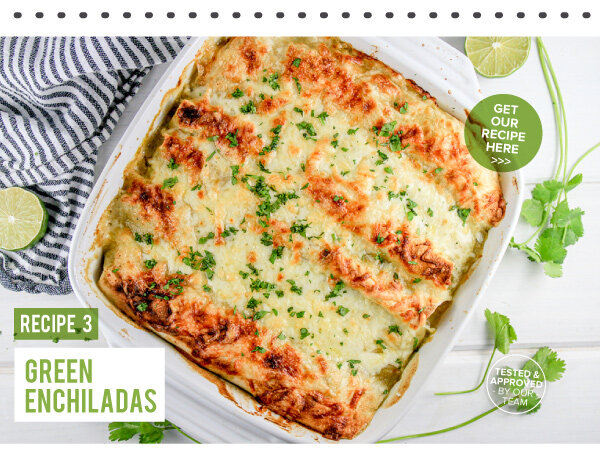
Chicken Green Enchiladas
Makes 8 enchiladas 

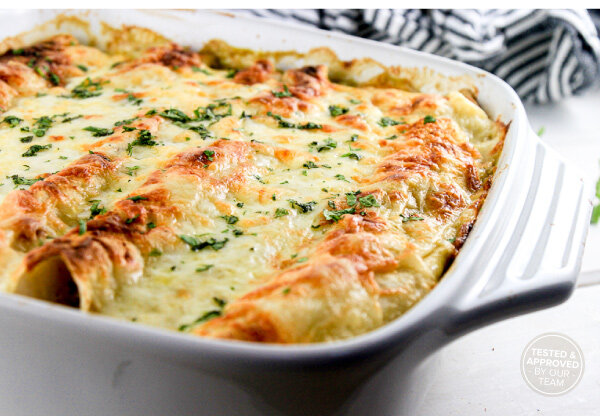
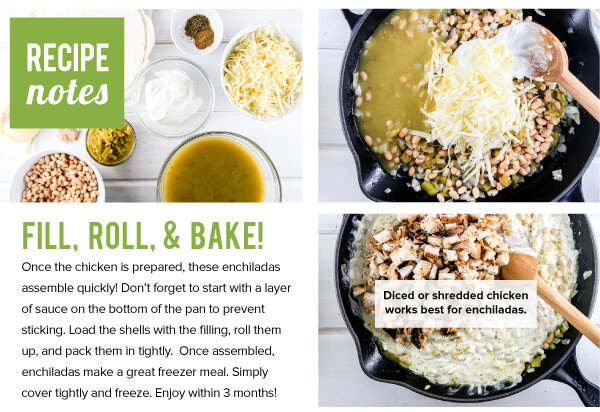
Cheesy and creamy, these green enchiladas are one great definition of comfort food! The green enchilada sauce is enhanced with a filling of grilled and diced chicken, white beans, green chilies, cheese, onion, garlic, herbs, and a little sour cream. After stuffing and rolling the enchiladas, add another layer of sauce on top. Don’t forget to finish with a hearty layer of cheese. After baking, garnish with fresh cilantro. So tasty! 

Enchiladas:
2 garlic & lime chicken breasts (marinated, grilled, and sliced)
2 tablespoons olive oil
1 onion, diced
2 cloves garlic, minced
1 teaspoon dried oregano
1 teaspoon dried cumin
1/2 teaspoon Kosher salt
1/2 teaspoon freshly ground pepper
1 can (4 oz) diced green chilies
1 can white beans, rinsed and drained
2 cups Monterey Jack cheese, shredded
1 can (28 oz) green enchilada sauce
1 cup sour cream 

Garnishes:
Lime wedges, Fresh cilantro leaves, Pickled jalapeños, Hot sauce 

Directions:
1. Preheat the oven to 400 degrees F. 

2. Sauté the onion and garlic in a large skillet until the onion is translucent. Season the onions with oregano, cumin, salt, and pepper. 

3. Add the green chilies, white beans, 1 cup of grated cheese, 1 cup green enchilada sauce, and 1 cup of sour cream. Stir to combine. Add the diced chicken and fold together until combined. 

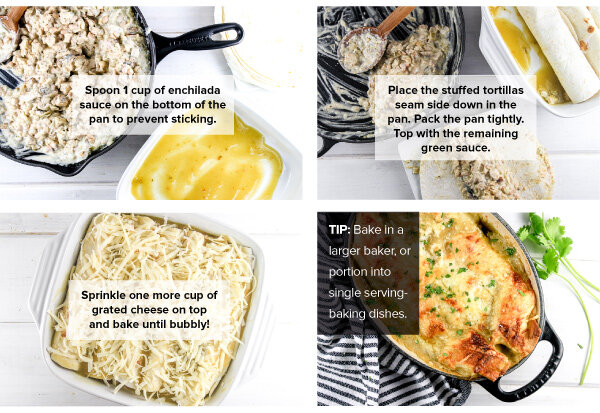
4. Spoon 1 cup of enchilada sauce around the bottom of the pan. This recipe makes about 8 enchiladas which can fit into a standard 9x12 casserole pan, or individual sized dishes that fit 2 enchiladas each. 

5. Fill the tortillas with a scoop of the chicken mixture and roll up tightly. Place the stued tortillas seam side down in the pan. Pack the pan tightly. 

6. Spoon more enchilada sauce on top of the rolled tortillas. Sprinkle one more cup of grated cheese on top. 

7. Bake for 20-25 minutes or until the cheese has started to brown and the enchiladas are bubbling hot. 

8. Serve warm with your choice of garnishes.

Sweet Potato Tacos

SweetPotatoTacos_v2_01.jpg

This time of year we love any excuse to use our grill.

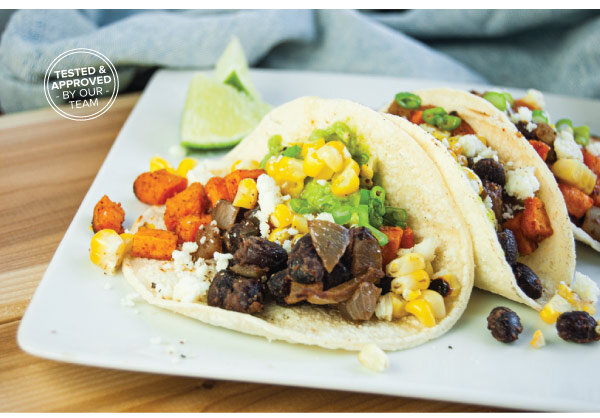
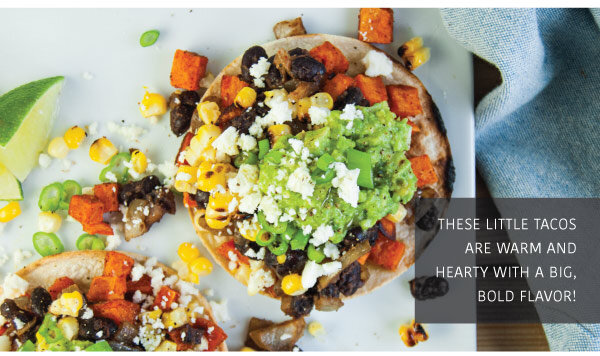
IN THIS ISSUE, we feature roasted sweet potato tacos with grilled sweet corn and tangy guacamole. Good tacos are the product of many quality parts, and wow, are these parts tasty! 

Sweet Potato Tacos with Grilled Corn and Avocado
Makes 12 small tacos

We love any excuse to use our grill. This recipe features roasted sweet potato tacos with grilled sweet corn and tangy guacamole. Good tacos are the product of many quality parts, and wow, are these parts tasty!

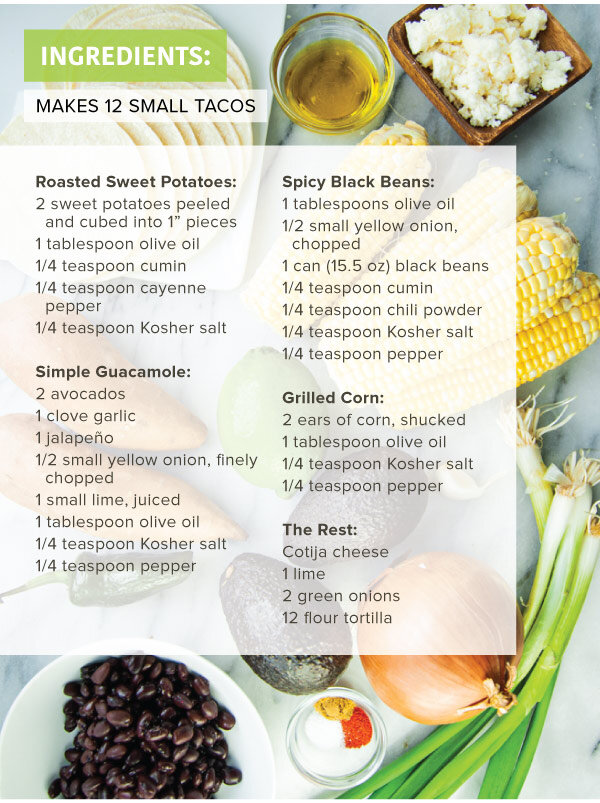
For the Roasted Sweet Potatoes:
2 sweet potatoes peeled and cubed into 1” pieces
1 tablespoon olive oil
1/4 teaspoon cumin
1/4 teaspoon cayenne pepper
1/4 teaspoon Kosher salt

For the Simple Guacamole:
2 avocados
1 clove garlic
1 jalapeño
1/2 small yellow onion, finely chopped
1 small lime, juiced
1 tablespoon olive oil
1/4 teaspoon Kosher salt
1/4 teaspoon pepper

Directions:
1. Preheat the oven to 425° F. Toss the cubed sweet potatoes with olive oil, cumin, cayenne and salt. Roast the sweet potato cubes in a large roasting dish for 30-40 minutes until tender and the edges begin to brown.

2. Prepare the guacamole by combining all of the guacamole ingredients in a medium bowl and mash with a fork until creamy. Transfer the guacamole to a serving bowl, and set aside.

3. In a medium pan over medium heat, cook the onion in the olive oil until the onion is soft and translucent, about 3-5 minutes. Add the black beans, cumin, chili powder, salt and pepper and cook over low heat, stirring occasionally to the beans don’t scorch.
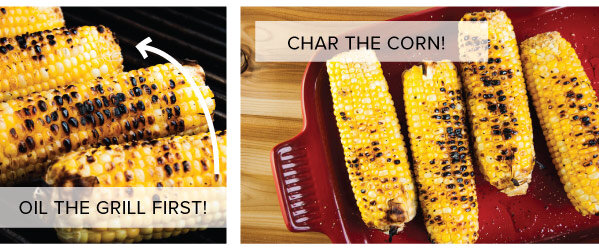
4. Oil and preheat grill. Drizzle the corn with olive oil and sprinkle with salt and pepper. Grill the corn over direct heat for about 10 minutes, turning often until charred all over. Remove from the grill and let the corn cool slightly. Cut corn from the cob.

5. While the corn cools, grill the flour tortillas until grill marks appear.

6. Remove the potatoes from the oven and assemble the tacos, first layering the beans, then the sweet potatoes, then the corn, and finally the guacamole. Top with crumbles of cotija cheese, sliced green onions, and a squeeze of lime.

They're Here! Summer Vegetables Ready to Stuff

StuffedVeggies_v2_01.jpg

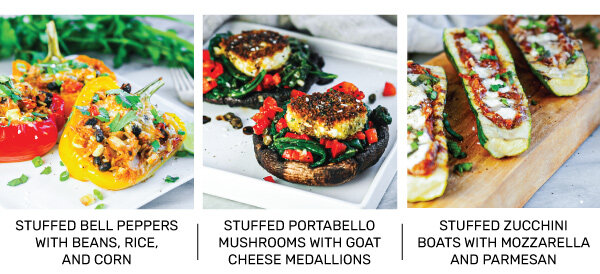
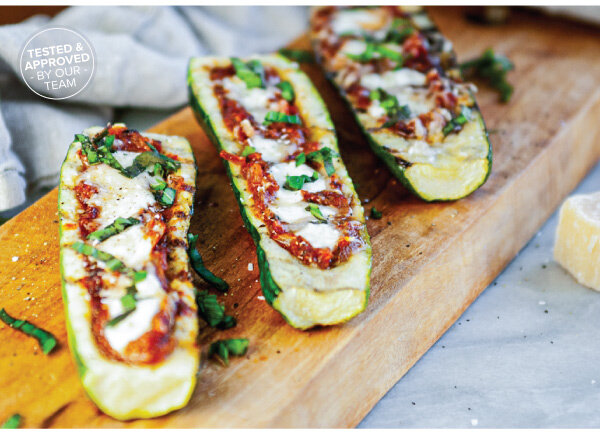
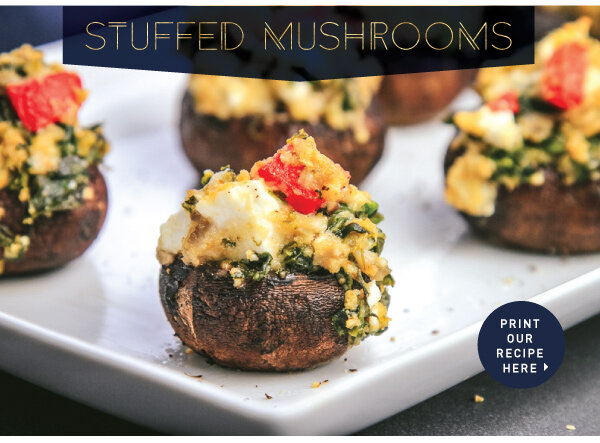
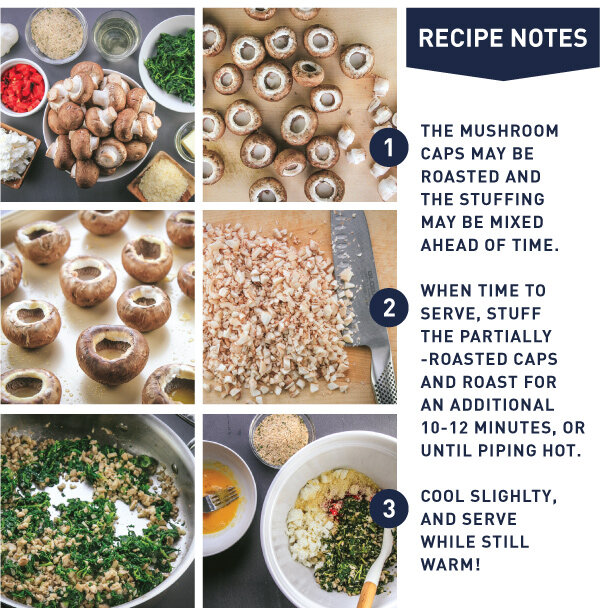
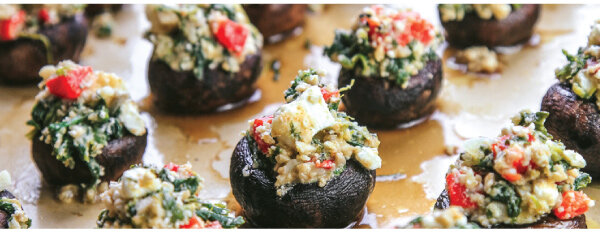
We're taking advantage of the fresh harvests found at farmers' markets, in our gardens, and at roadside stands, and are making scrumptious stuffed vegetables ready to satisfy any craving! 

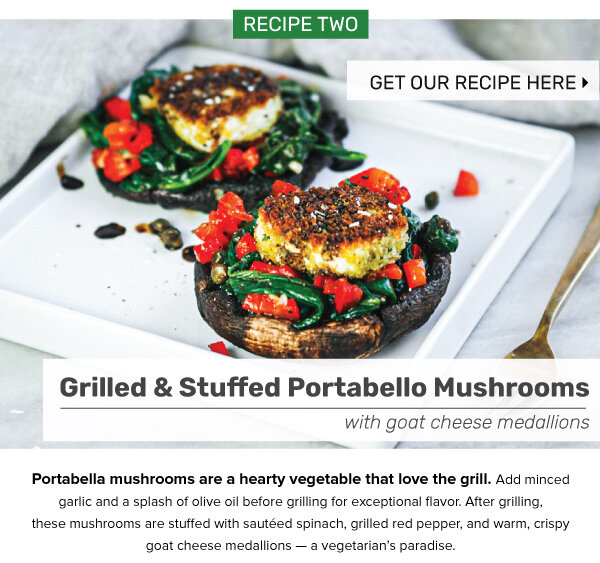
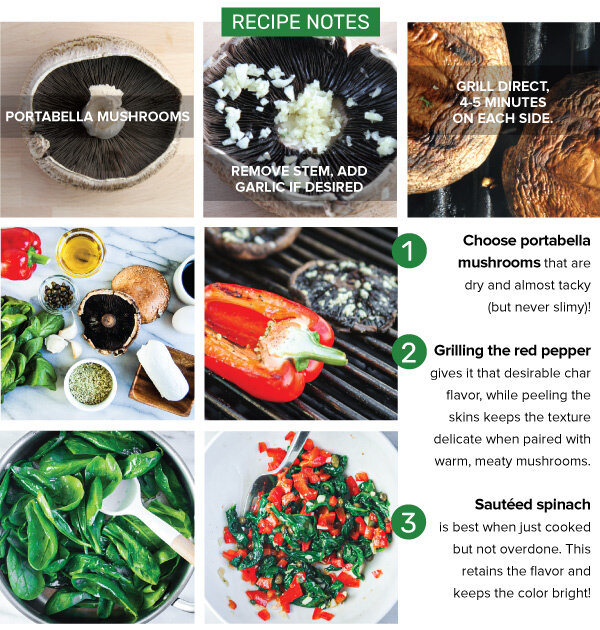
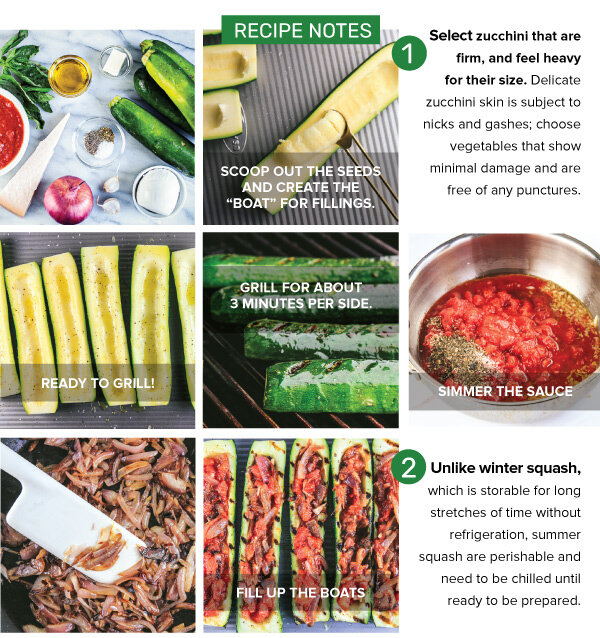
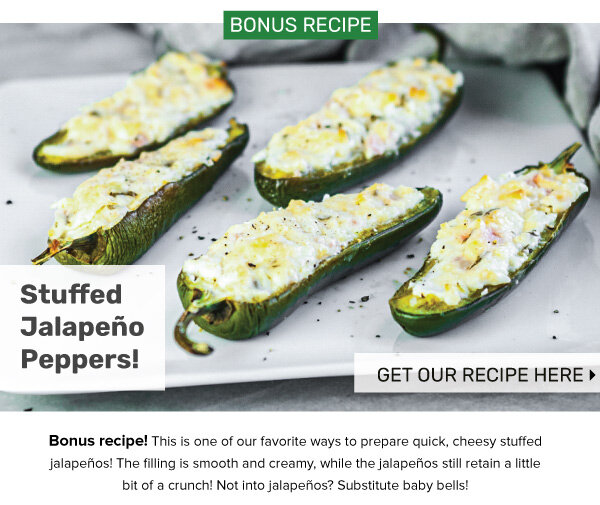
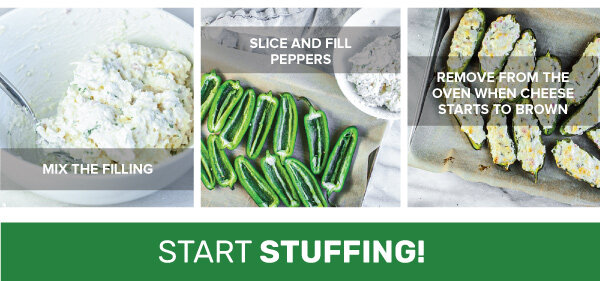
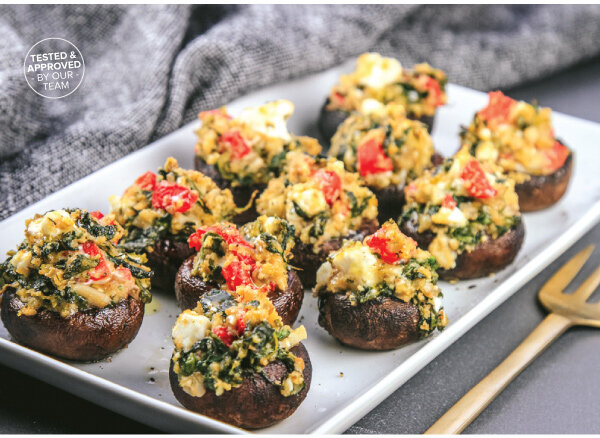
IN THIS ISSUE, we stuff peppers, mushrooms, and zucchini while sharing tips for cleaning veggies properly. PLUS, a bonus recipe, stuffed jalapeños!

Easy Pasta Dinners from the Pantry

1Pasta2020_v2_01 copy.jpg

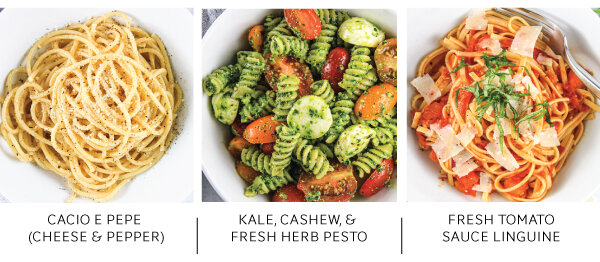
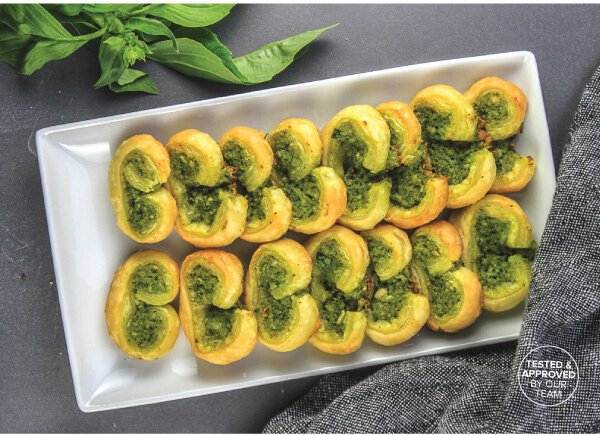
A good pasta dish transforms everyday, pantry ingredients into something extraordinary for any day of the week. IN THIS ISSUE, we present three of our easiest to implement pasta dishes that deliver big on flavor and satisfaction! Buon appetito!

A Modern Makeover for Casseroles

Modern_Makeover_Casseroles.jpg

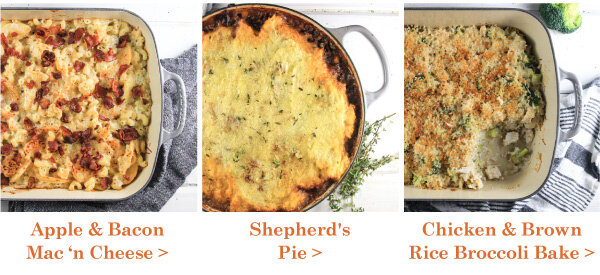
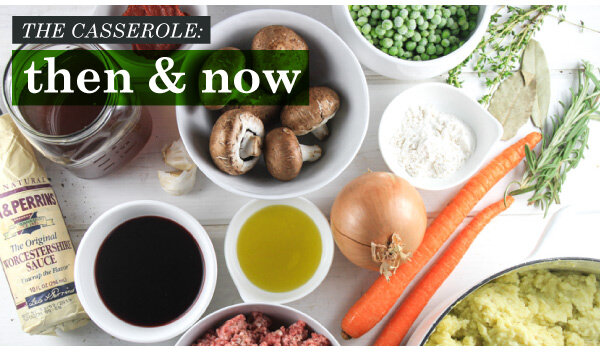
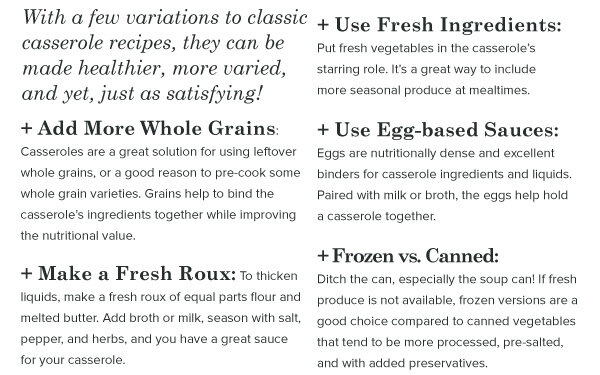
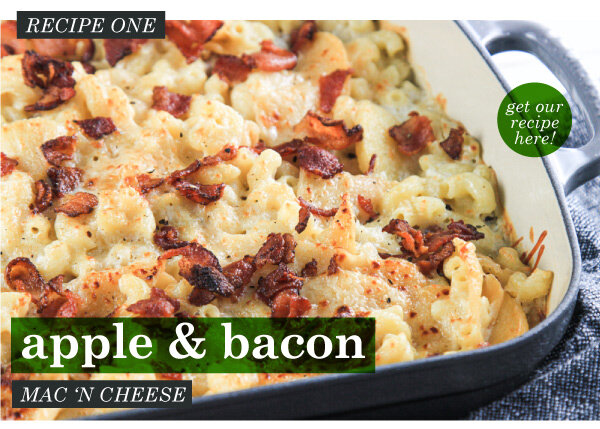
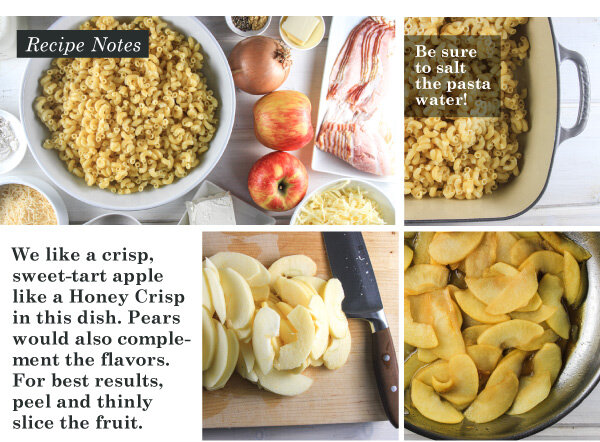
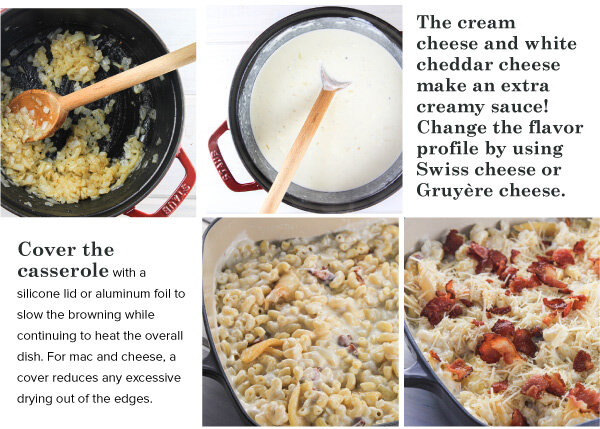
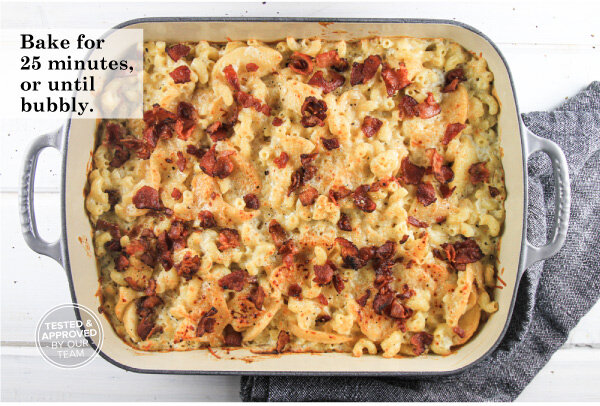
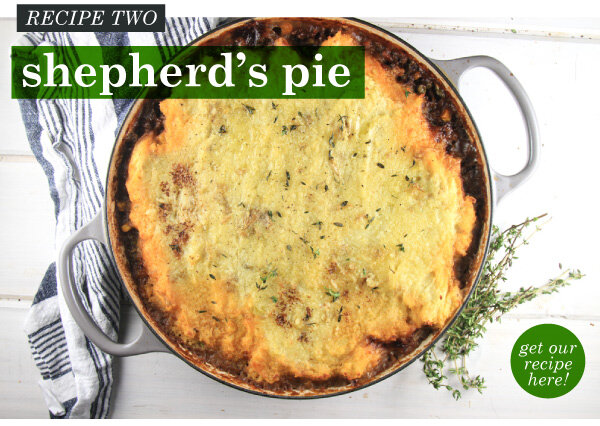
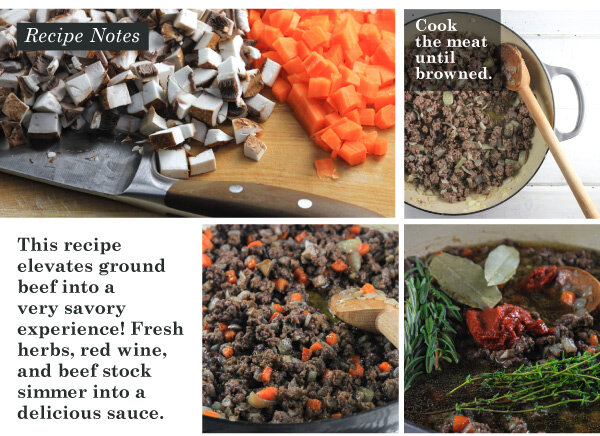
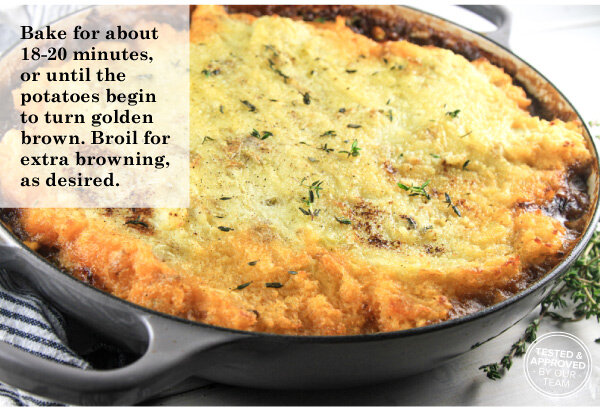
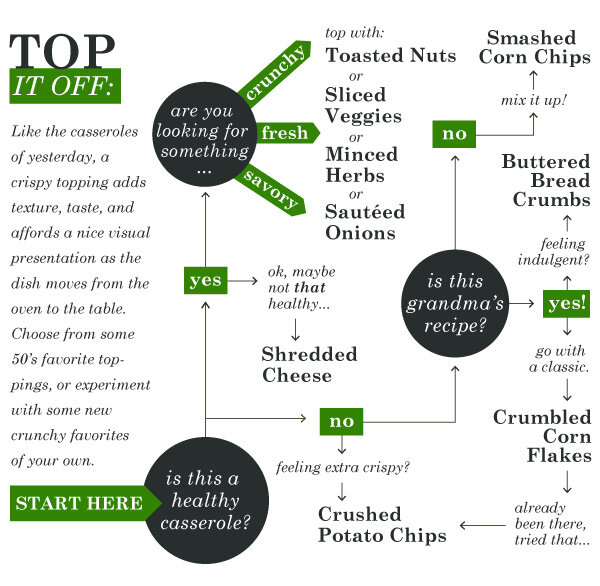
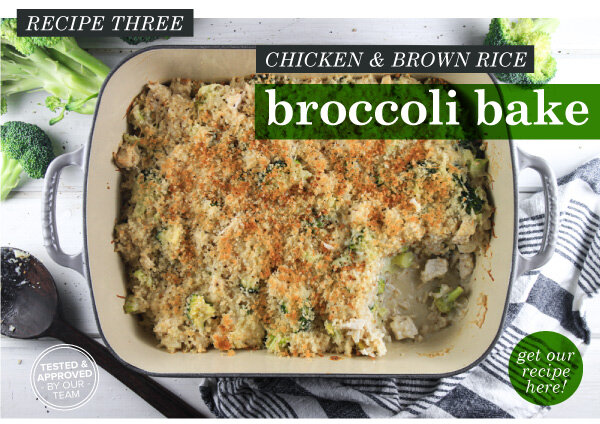
Sensible and hearty, casseroles are a great answer to "what's for supper?" IN THIS ISSUE, you'll find several great recipes: a sweet and savory Apple & Bacon Mac ‘n Cheese, a ground beef version of Shepherd’s Pie, and finally, a delicious Chicken & Brown Rice Broccoli Bake - delicious!

Entertain with these Easy Appetizers!

Appetizers_v1_01.jpg

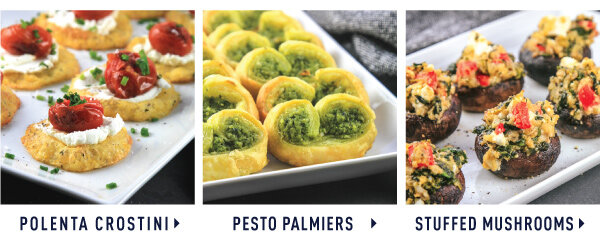
YOU'RE IN THE MOOD FOR A PARTY -- WE ARE, TOO! We love this season because it is filled with family and friends, and plenty of good times. Whether you're the party host, or bringing something to a get-together, this issue features three easy appetizer recipes - all delicious!
Our Best to You this Festive Season!

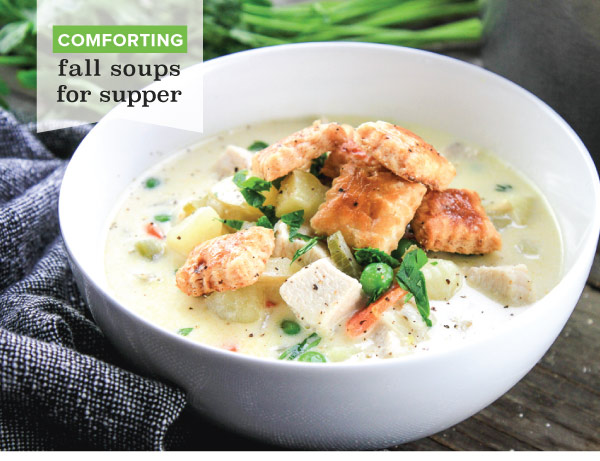
Comforting Fall Soups for Supper

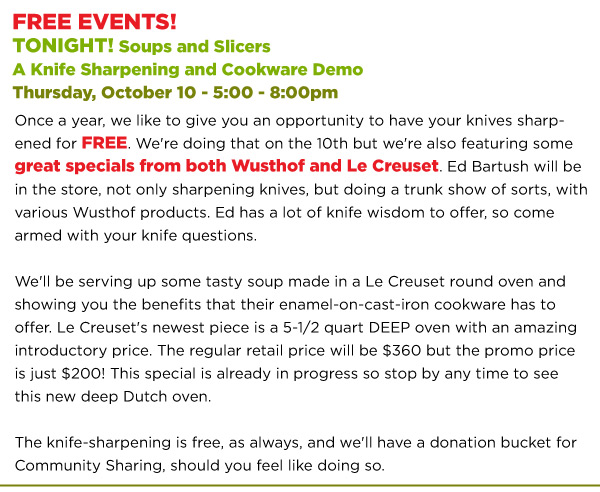
TONIGHT! Knife Sharpening - PLUS, Comforting Fall Soups for Supper
Fall Soups
Fall Soups
Fall Soups
Classes and Events
Introduction
Event
Events
Join Us on Facebook
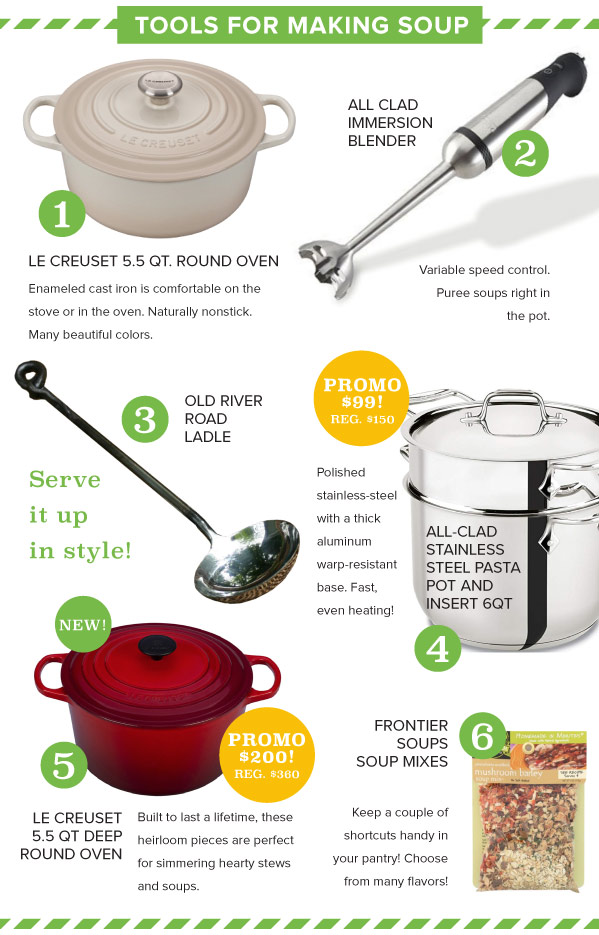
Featured Products
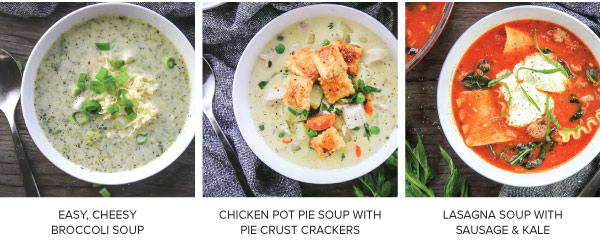
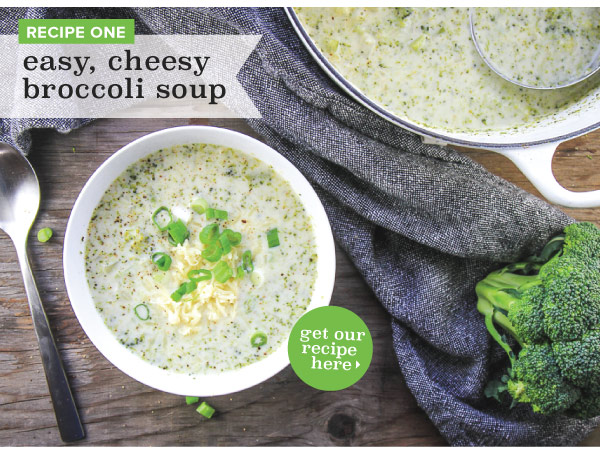
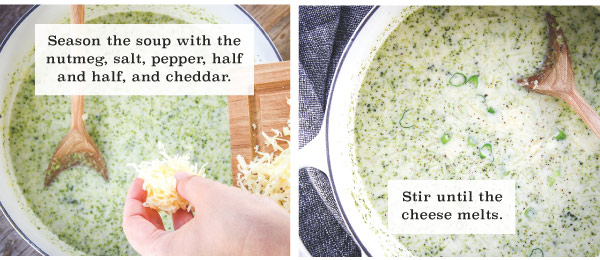
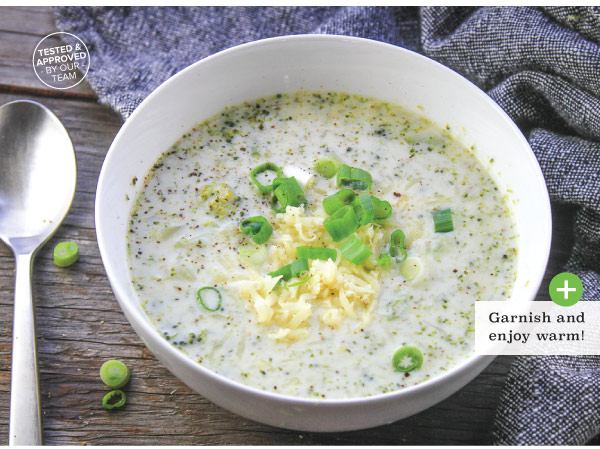
recipeone Easy Cheesy Broccoli Soup
Easy Cheesy Broccoli Soup
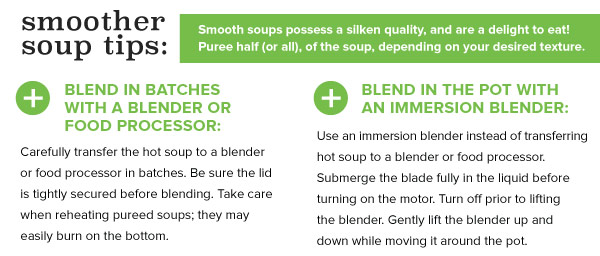
Smoother Soup Tips
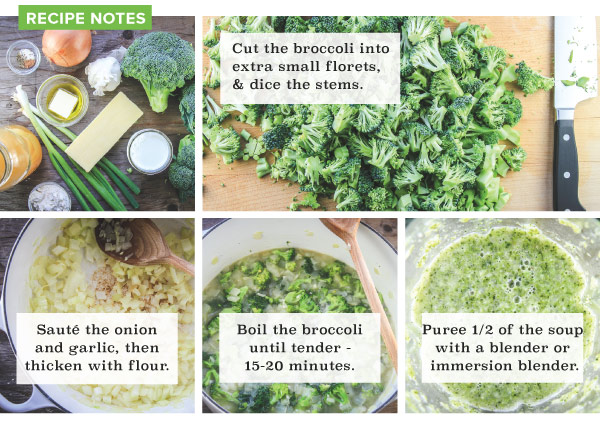
Easy Cheesy Broccoli Soup
Easy Cheesy Broccoli soup
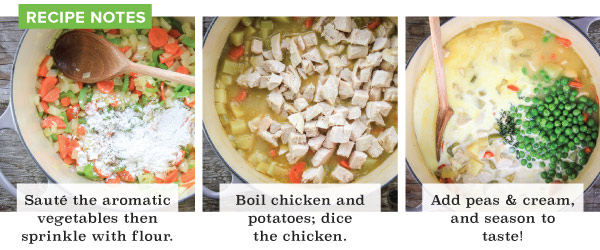
recipetwo Chicken Pot Pie Soup
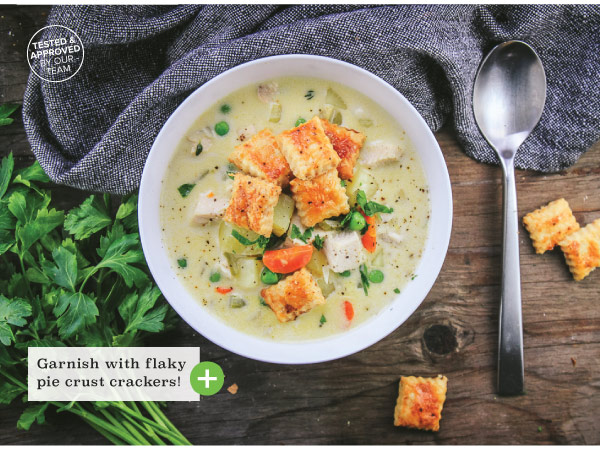
Chicken Pot Pie Soup
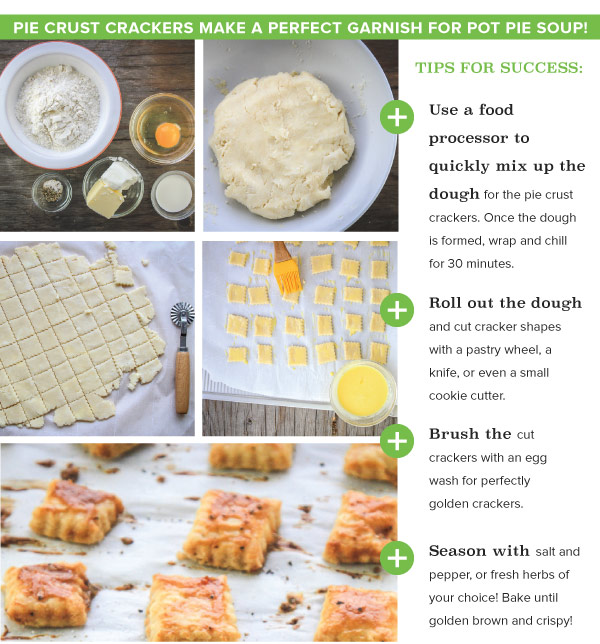
Pie Crust Crackers
Chicken Pot Pie Soup
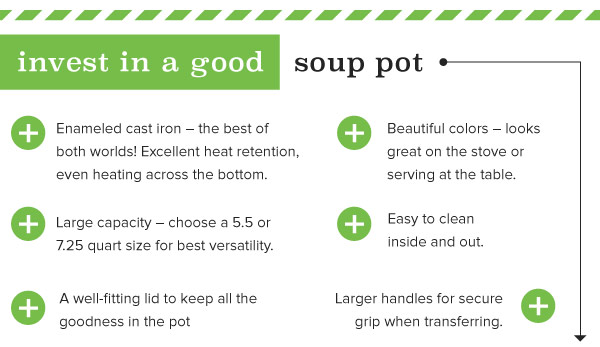
Invest in a Good Soup Pot
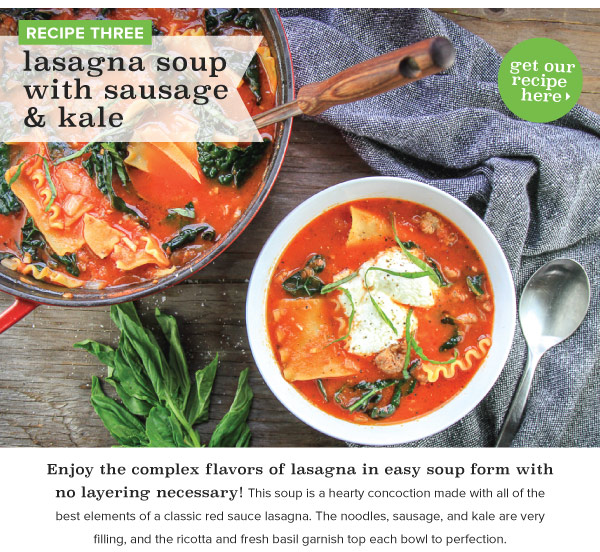
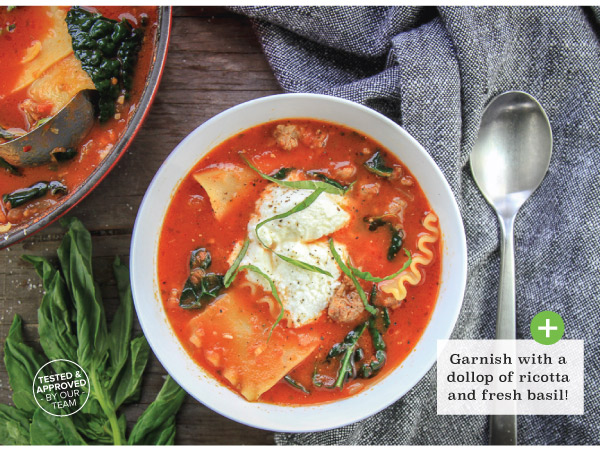
recipethree Lasagna Soup with Sausage and Kale
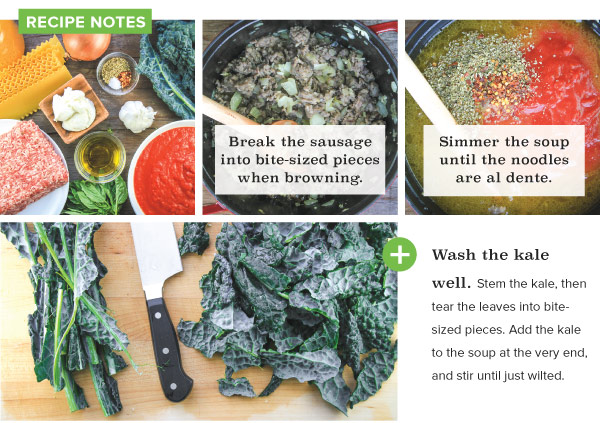
Lasagna Soup with Sausage and Kale
Spacer


Happy Cooking!

Kathy Magaluk and all of us at Acorn Farm 

Better Burgers on the Grill

NEW! Summer Classes, PLUS, Learn How to Grill Better, Tastier Burgers!
Better Burgers on the Grill
Recipes
Classes and Events
Intro
Museware
E-Cloth
Steak Knives
Facebook
Featured Products
Better Burger Basics
recipeone Southwest Burger with Chipotle Mayo
Grilling Crepes
Stay Safe Around Ground Beef
recipetwo Classic Burger with Secret Sauce
recipethree BBQ Burger
Crispy Onions
Happy Grilling
Spacer


Happy Cooking!

Kathy Magaluk and all of us at Acorn Farm